Using a shared filesystem
To add File Share, you must first create a Server. To do this, go to Infrastructure → Storage.
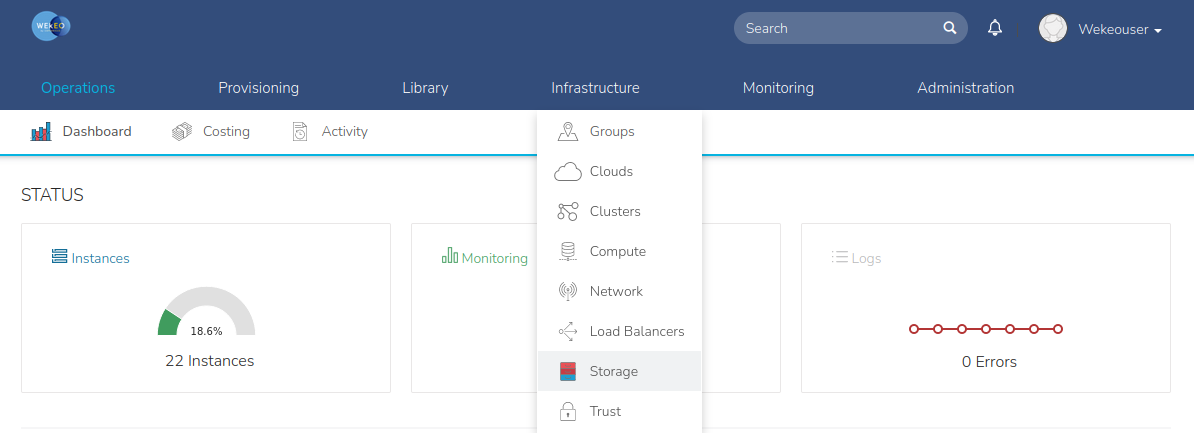
After going to Storage, switch to the Servers tab.

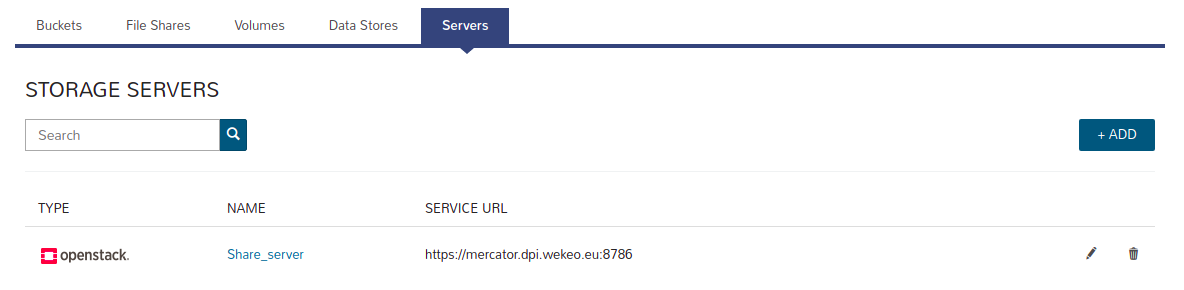
To add a new server, press the "+ ADD" button.
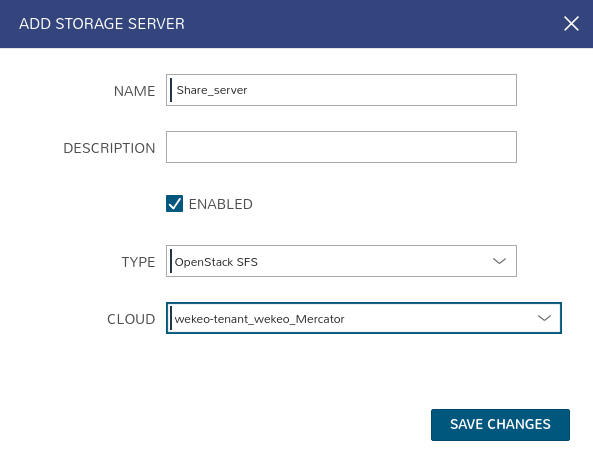
After pressing the button, a window with the form of creating a new server will appear:
- NAME - name of the new server,
- DESCRIPTION - description of the new server,
- ENABLED - this option should be checked by default,
- TYPE - change to the Openstack SFS option,
- CLOUD - select the cloud on which you want to run the server.
The new server will be visible in the server list.
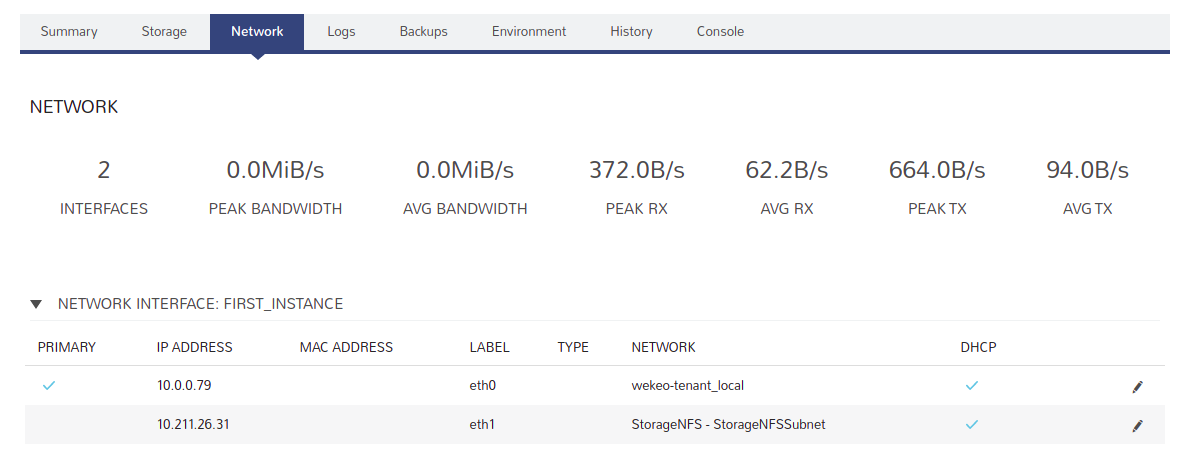
Remember that if you want your instance to have access to File Share it must have an additional StorageNFS network interface attached.
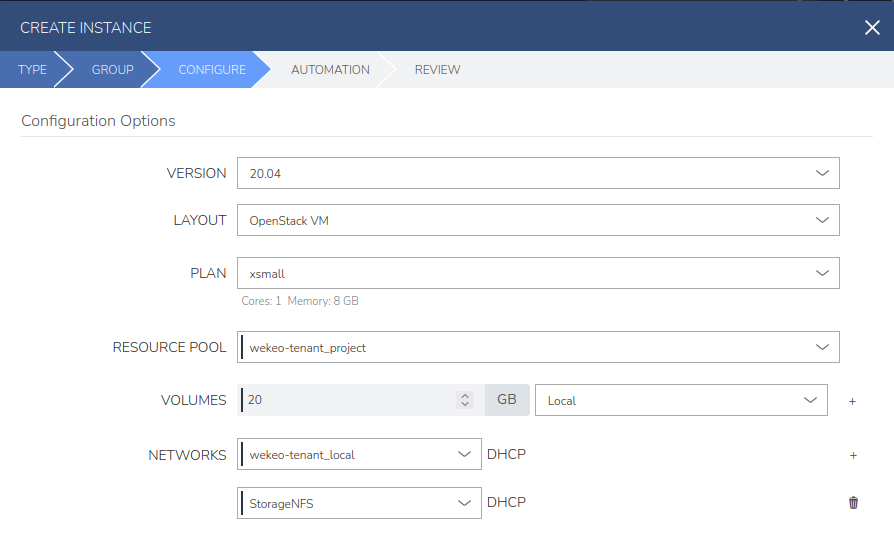
After creating an instance, go to its details and then from the bottom section select the "Network" tab. Save the IP to the Storage NFS network, it will be needed when granting access to this address.
If you have an instance with attached StorageNFS network, you can proceed to create a File Share. To do this go to Infrastructure → Storage and then select the File Shares tab. To create a new File Share, press the "+ADD" button and then select Openstack SFS Share.
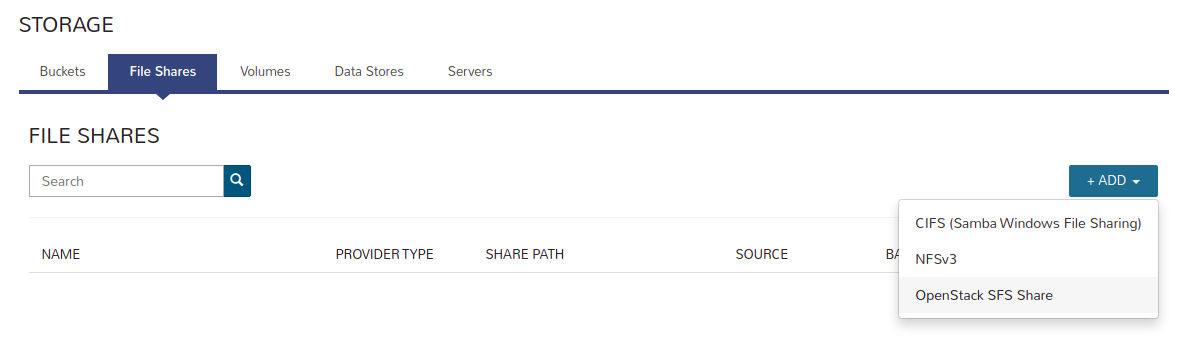
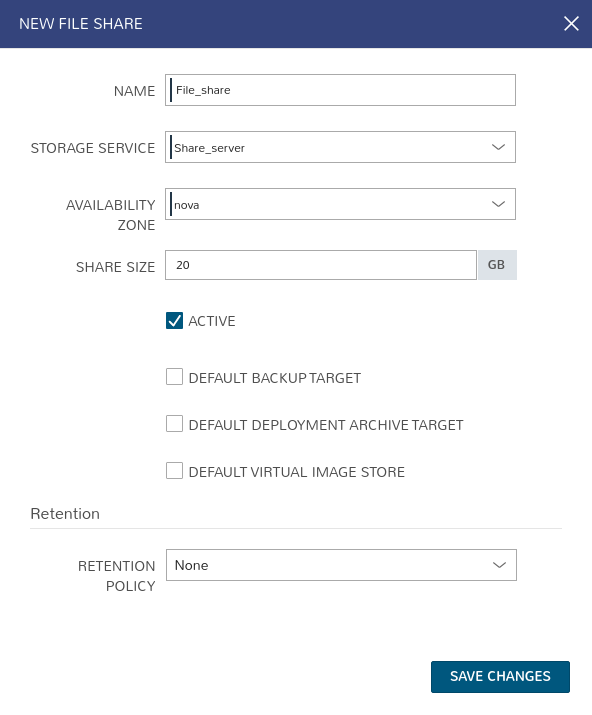
After selecting this option, a window will appear with a form for creating a new File Share:
- NAME - name of the new File Share,
- STORAGE SERVICE - select the server you created earlier,
- AVAILABILITY ZONE - select the "nova" option,
- SHARE SIZE - File Share size.
Leave the rest of the options unchanged. After entering the necessary data, press the "SAVE CHANGES" button.
Once created, File Share will be visible in the File Shares list. Note the SHARE PATH column, it will only contain "/" as soon as File Share is created.

However, the entire path should be generated within a few minutes. If the path did not generate up to ~ 30 min, please contact with WEkEO Support.
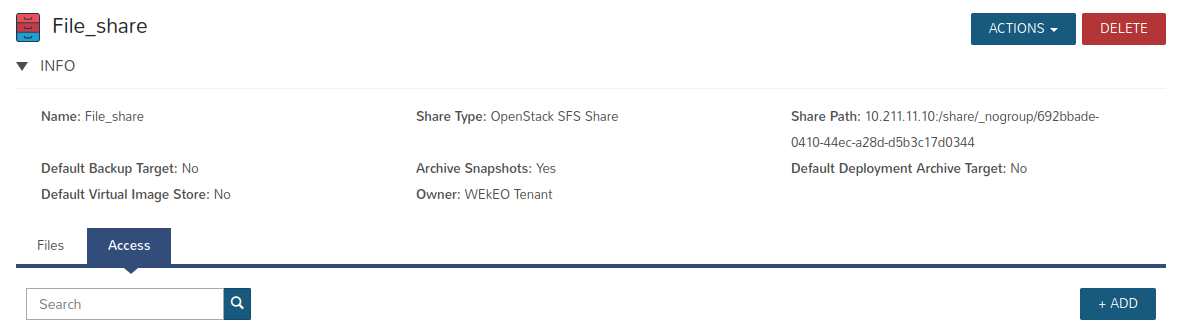
To go to detailed information about a given Share File click on its name.

To access a given File Share from an instance level, add a rule for a specific address. To do this, select the Access tab and then press the "+ ADD" button.
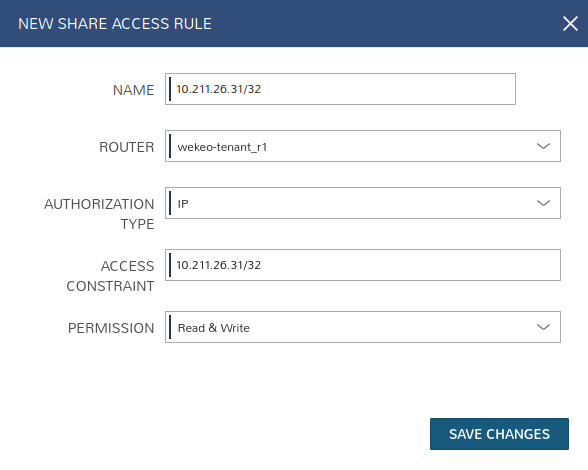
After pressing the button, the form will appear with the creation of a new rule:
- NAME - we suggest that you enter the same address as in the "ACCESS CONSTRAINT" field,
- ROUTER - router in your cloud,
- AUTHORIZATION TYPE - select the "IP" option,
- ACCESS CONSTRAINT - enter the address that you previously saved from the Network tab from the instance details, and then add /32 to the end to restrict access to this address only (e.g. 10.211.26.31/32),
- PERMISSION - set Read & Write to be able to both read and write files.
After clicking on “SAVE CHANGES” you will see:

Then you can mount the newly created file share, first go to the instance via SSH
ssh -i <private_key> <user>@<floating_ip>and show configuration of the eth1 interface. As you can see, the interface is in the DOWN state.
user@first_instance:~$ ip a show eth1
3: eth1: <BROADCAST,MULTICAST> mtu 9000 qdisc noop state DOWN group default qlen 1000
    link/ether fa:16:3e:94:01:fb brd ff:ff:ff:ff:ff:ff
Configure the eth1 network interface with command “dhclient”.
user@first_instance:~$ sudo dhclient eth1Check if the network interface “eth1” is UP.
user@first_instance:~$ ip a show eth1
3: eth1: <BROADCAST,MULTICAST,UP,LOWER_UP> mtu 9000 qdisc fq_codel state UP group default qlen 1000
    link/ether fa:16:3e:94:01:fb brd ff:ff:ff:ff:ff:ff
    inet 10.211.26.31/21 brd 10.211.31.255 scope global eth1
       valid_lft forever preferred_lft forever
    inet6 fe80::f816:3eff:fe94:1fb/64 scope link
       valid_lft forever preferred_lft forever
Then install nfs-common.
user@first_instance:~$ sudo apt install nfs-commonBefore creating the mountpoint and mounting share, edit the file /etc/idmapd.conf. In this file you will find the entry:
# Domain = localdomainChange to:
Domain = wekeo.internalSave the changes.
Create a mountpoint for your file share.
user@first_instance:~$ mkdir mountpointMount the file share in your mountpoint. For this you need to copy the Share Path.

user@first_instance:~$ sudo mount 10.211.11.10:/share/_nogroup/692bbade-0410-44ec-a28d-d5b3c17d0344 mountpoint/If you get the error below. Remove and add access rule again.
mount.nfs: mount to NFS server '10.211.11.10:/share/_nogroup/692bbade-0410-44ec-a28d-d5b3c17d0344' failed: RPC Error: Procedure unavailableCheck if File Share has been mounted correctly.
user@first_instance:~$ df -h | grep share
10.211.11.10:/share/_nogroup/692bbade-0410-44ec-a28d-d5b3c17d0344   20G     0   20G   0% /home/user/mountpoint