How to create a Load Balancer
Create a security group for Load Balancer
Security Group with the role of allowing incoming connections on port 80 is required for Load Balancer. By default, there is no such role, so you need to create it.
Go to Infrastructure → Network and choose the Security Groups tab.

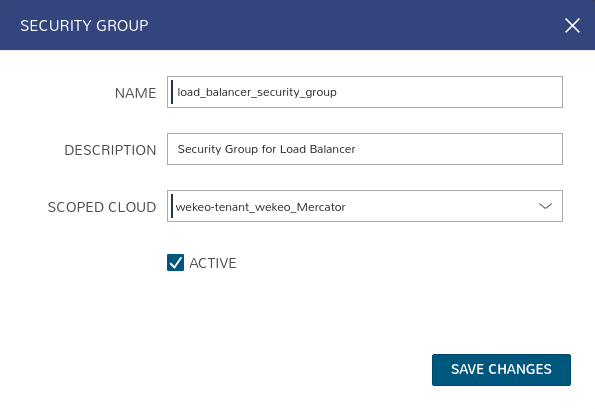
Select +ADD to create a new Security Group.
Complete the fields and click SAVE CHANGES.
You will see the list of security groups:
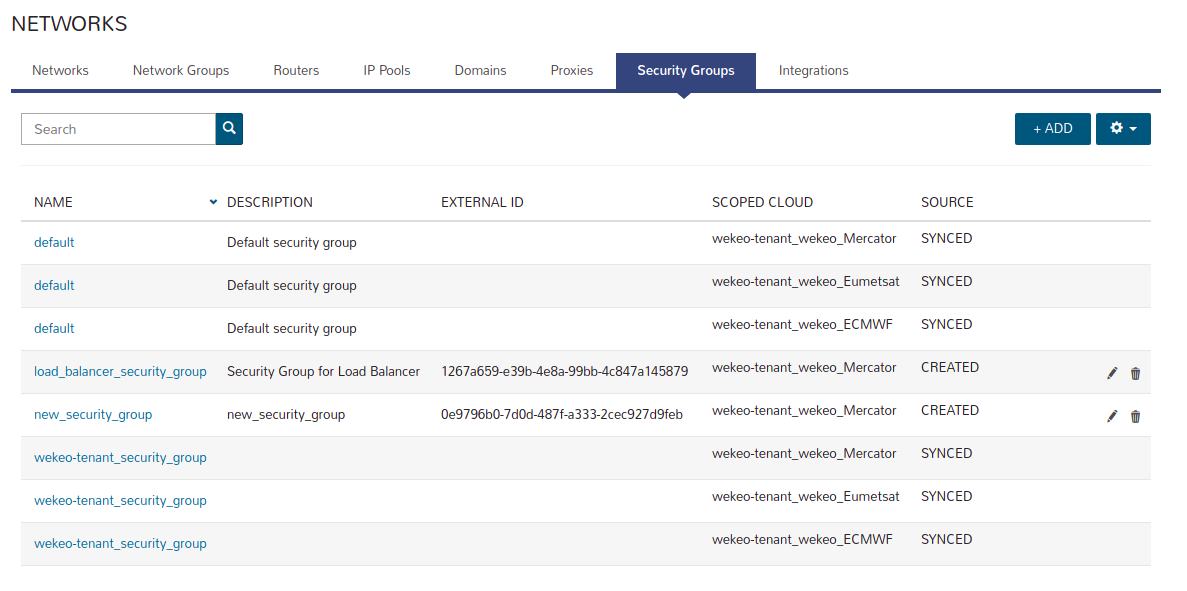
Select your newly created Security Group.
You will see:
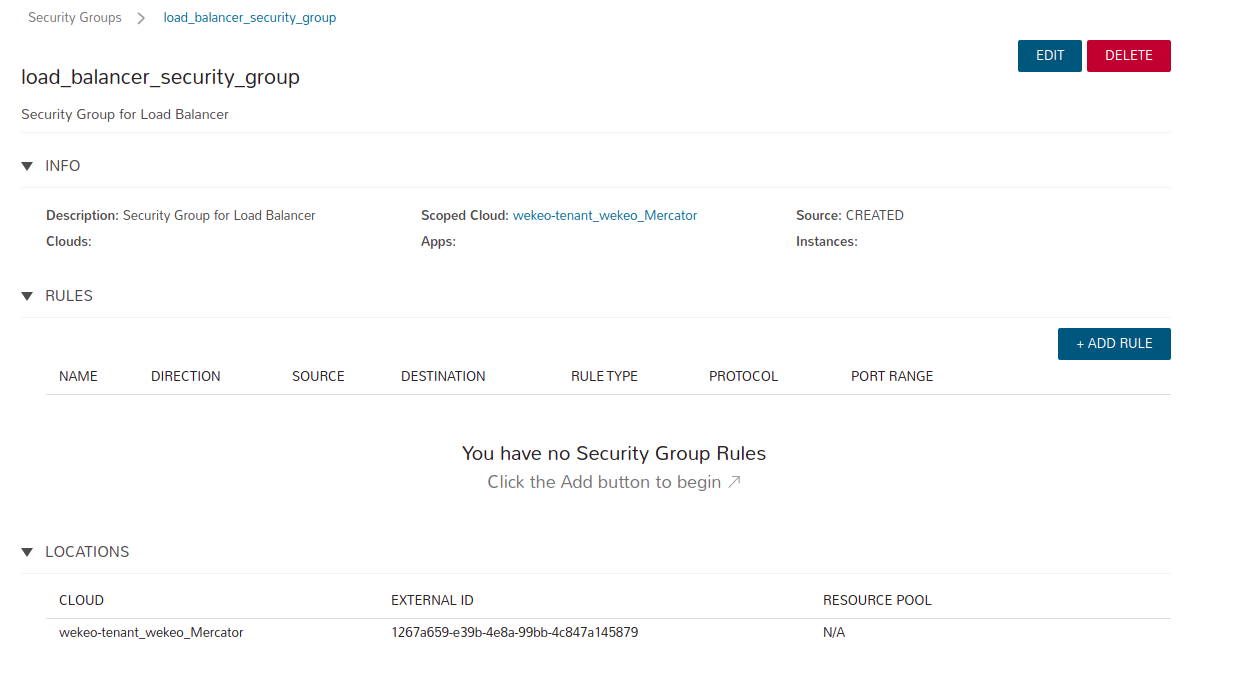
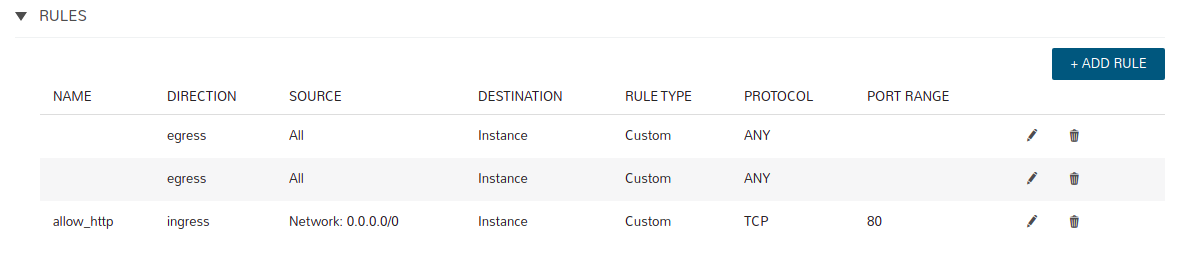
Please wait until the default “egress” rules appear and click +ADD RULE.

Complete the fields as below and click SAVE CHANGES.
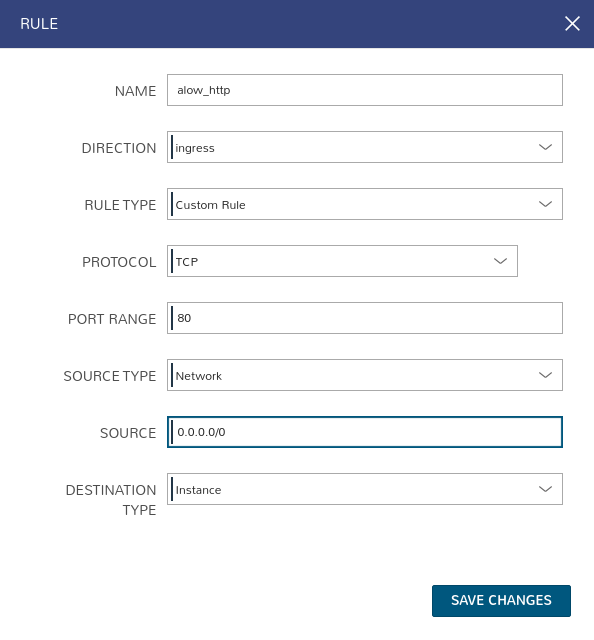
You will see:
Create a new Load Balancer
Load Balancer is created and managed in the Instances section. It is a virtual machine with preinstalled Apache software.
There is a restriction that does not allow adding existing virtual machines. Nodes can be created after creating the Load Balancer.
Go to Provisioning → Instances and select +ADD to create a new instance.
You will see:
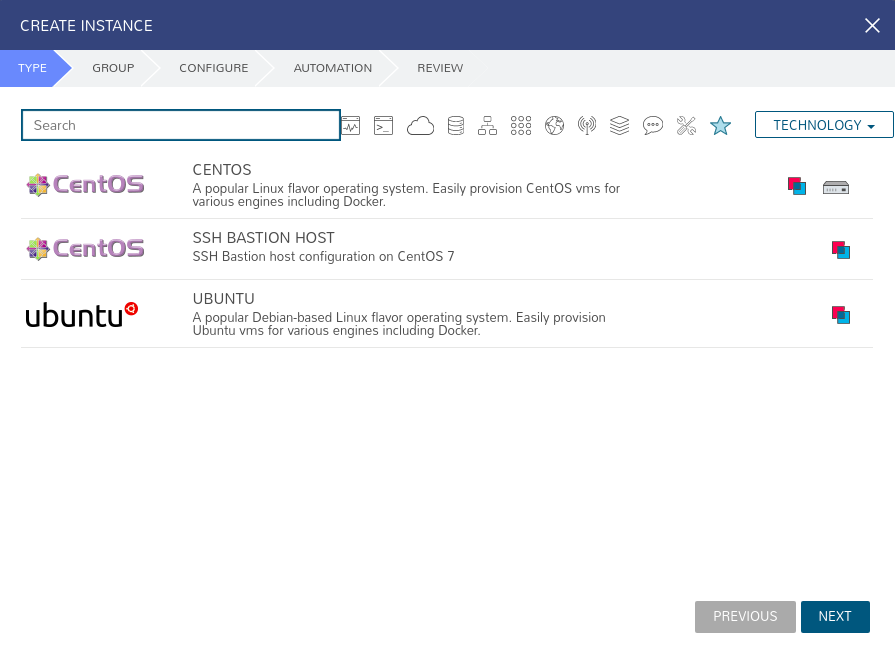
Click All icon (to the right of “Search” field).
You will see the TYPE panel.
Select APACHE type instance, then click NEXT.
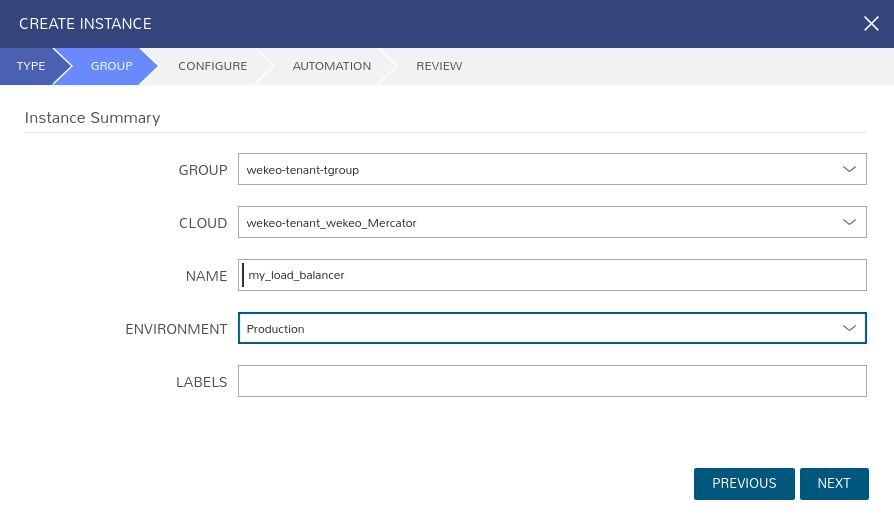
You will see the GROUP panel.
Fill in the fields and click NEXT.
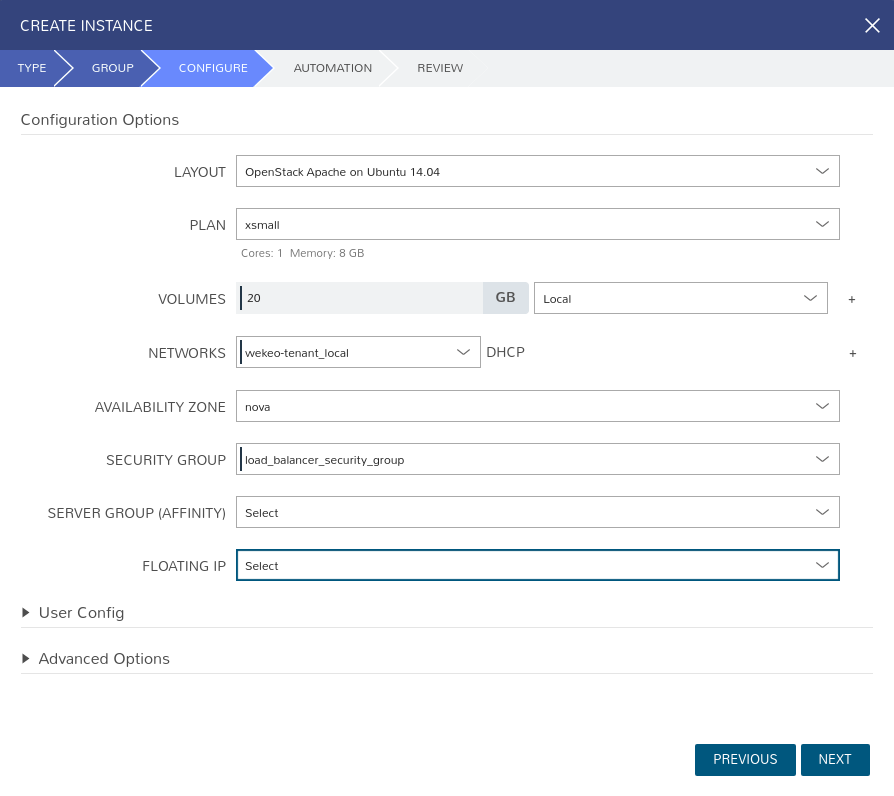
You will see the CONFIGURE panel.
Do not set the FLOATING IP.
Fill in the fields and click NEXT.
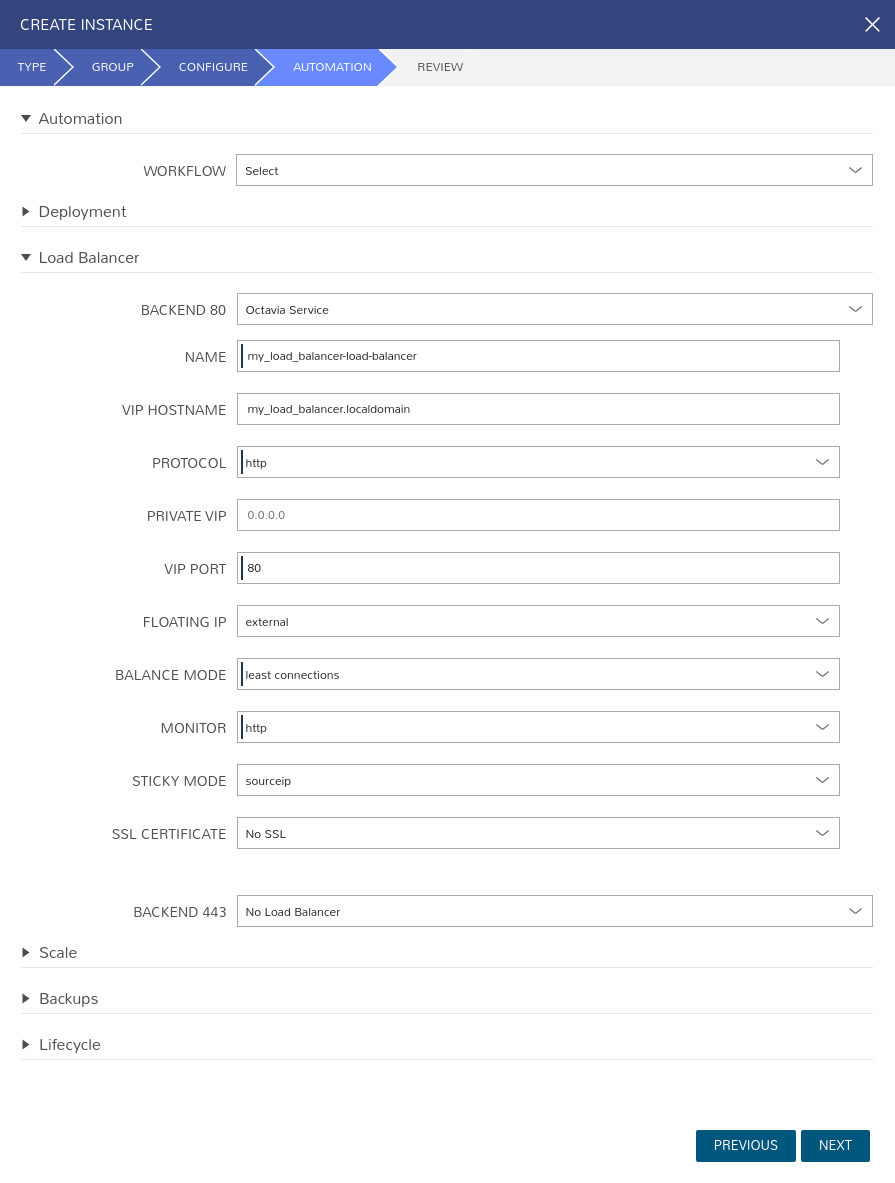
You will see the AUTOMATION panel.
Fill in the fields and click NEXT.
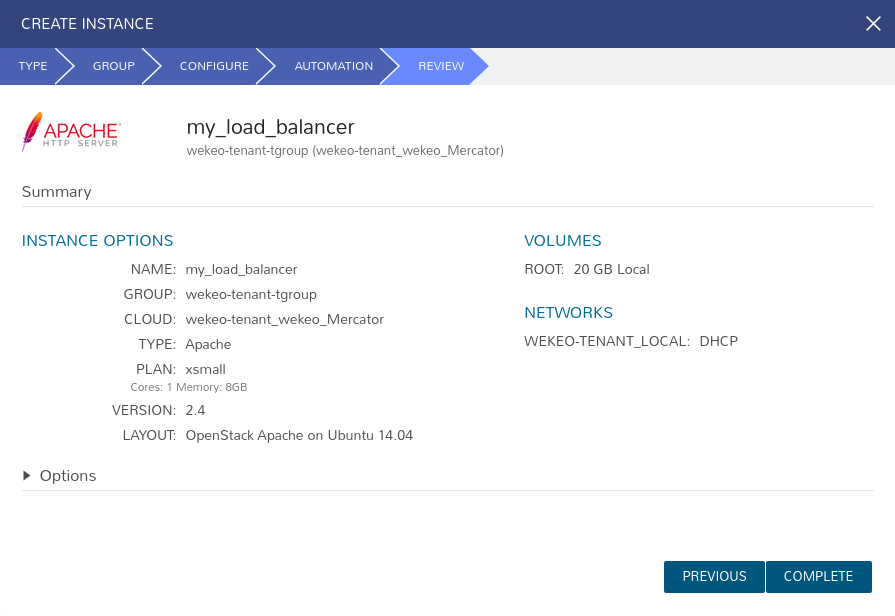
You will see the REVIEW panel. Click on the "COMPLETE" button to complete the creation of a new Load Balancer.
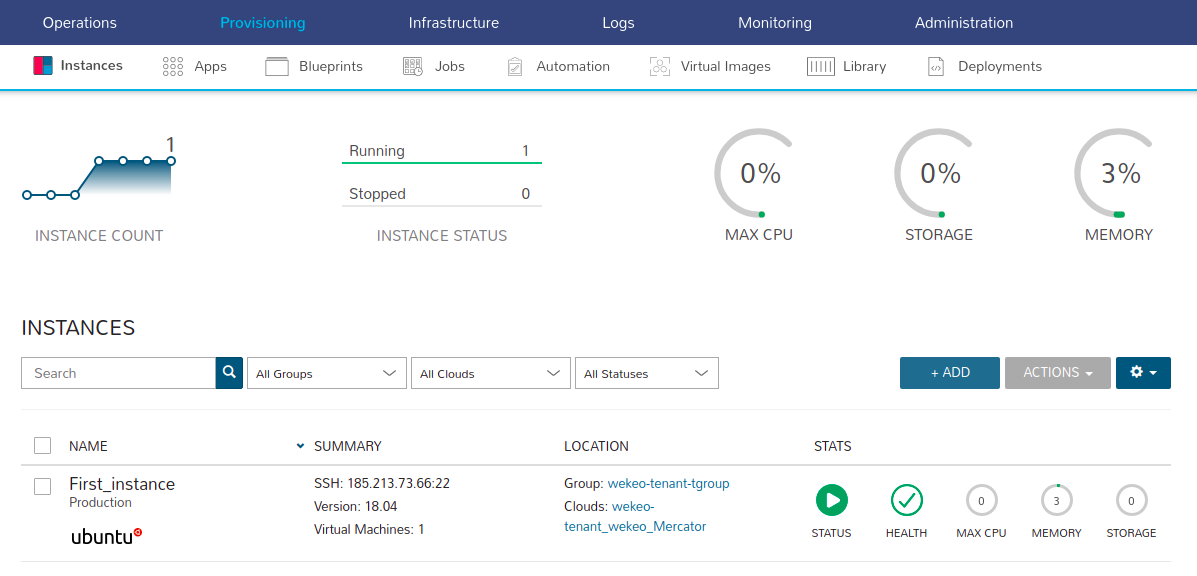
You will see the INSTANCES list.
At first, the status icon is the symbol of a rocket, which means that the instance is not ready.

If you click on the name of the instance (here: “my_load_balancer”), you will see the PROCESSES/STATUS: “provision - finalizing”.
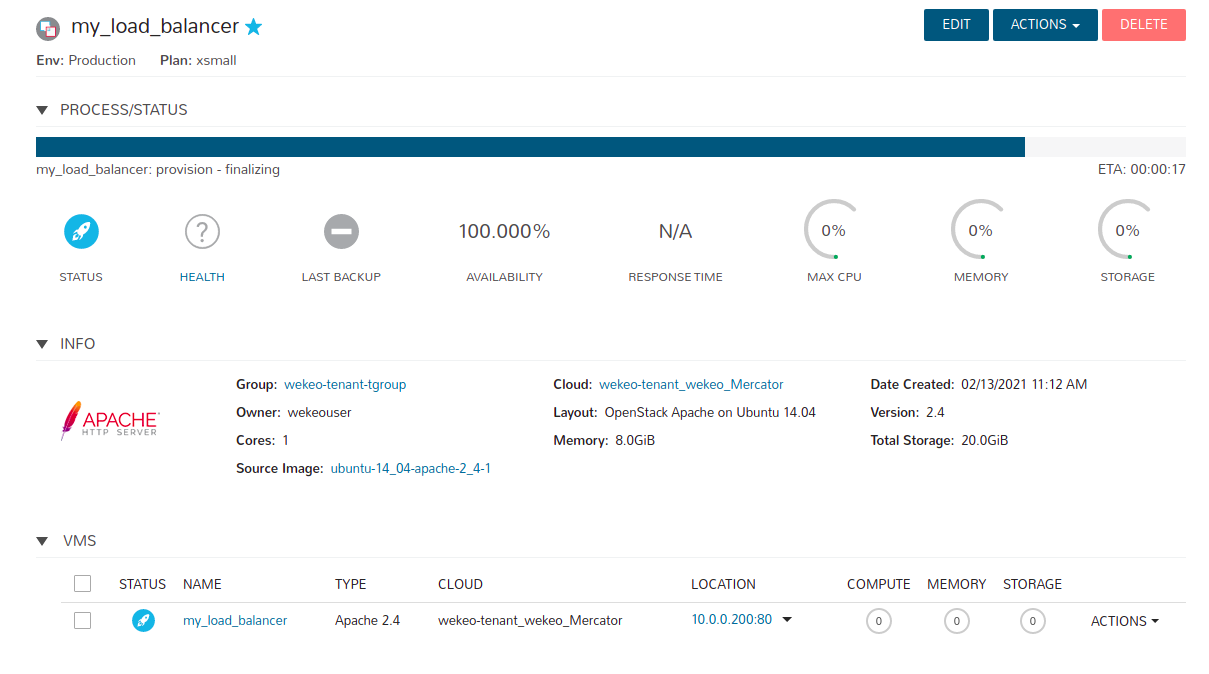
And the HEALTH: “question mark”.

Please wait until you see HEALTH: tick symbol in green.

Now choose the “Scale” panel from the menu:
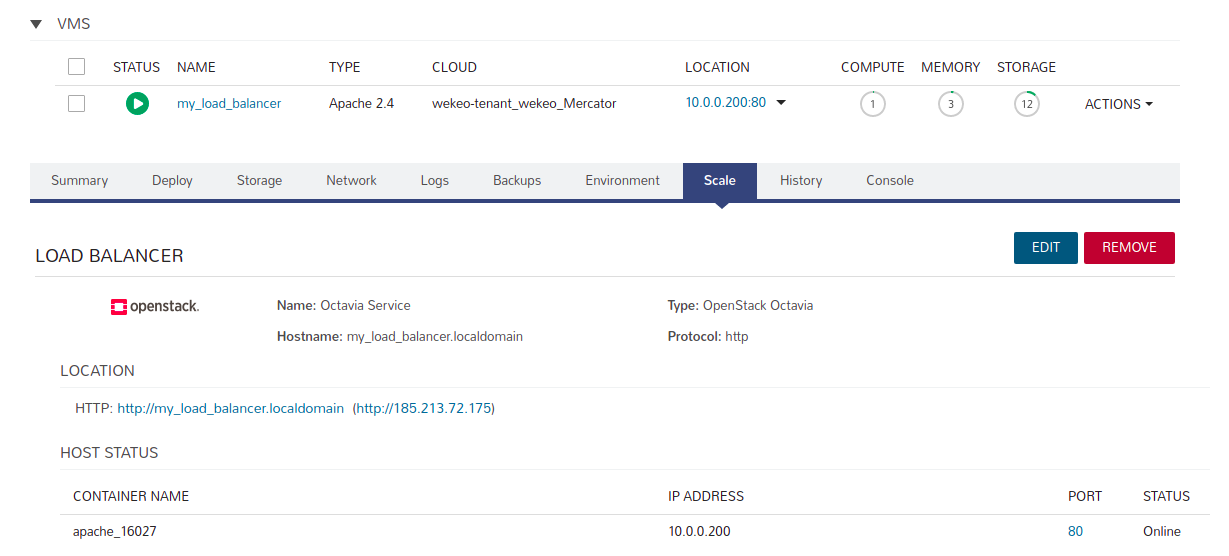
And click on address in LOCATION (here: http://185.213.72.175).
You will be redirected to another tab in your browser, and you will see:

Add a new node to Load Balancer
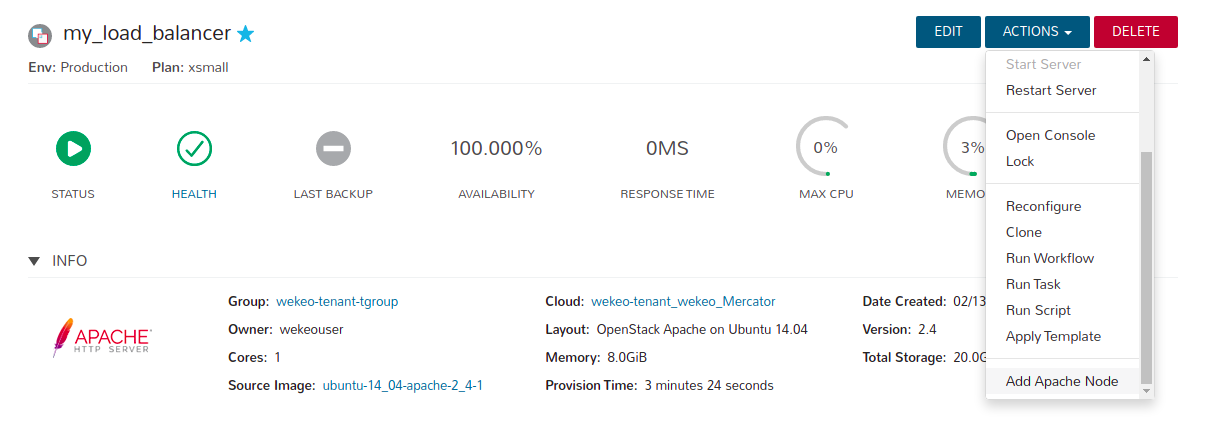
To add a new node, go to your Apache instance and select ACTIONS → Add Apache Node:
You will see the "EXECUTE INSTANCE ACTIONS?" Window.
Fill in the fields (set the number of nodes, you want to create) and click EXECUTE.

You will see the PROCESS/STATUS bar changing (provision – preparing resources):

You can see the list of nodes with the “rocket” icons – meaning that the nodes are being provisioned:

And finally, the list of all nodes ready:

Remove a node from Load Balancer
To remove a new node, go to your Apache instance and find section VMS.
Select ACTIONS → Remove Apache Node on the node you want to remove.

Confirm to remove the node.
Observer the STATUS changed:

After a few moments the removed node will disappear
