Creating and accessing an instance
Before creating an instance, make sure you have User or Tenant settings configured. If you do not have such settings set, you can follow this guide.
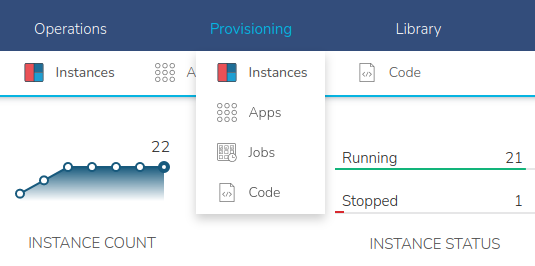
To create new instances, go to Provisioning → Instances.
Then press the "+ ADD" button
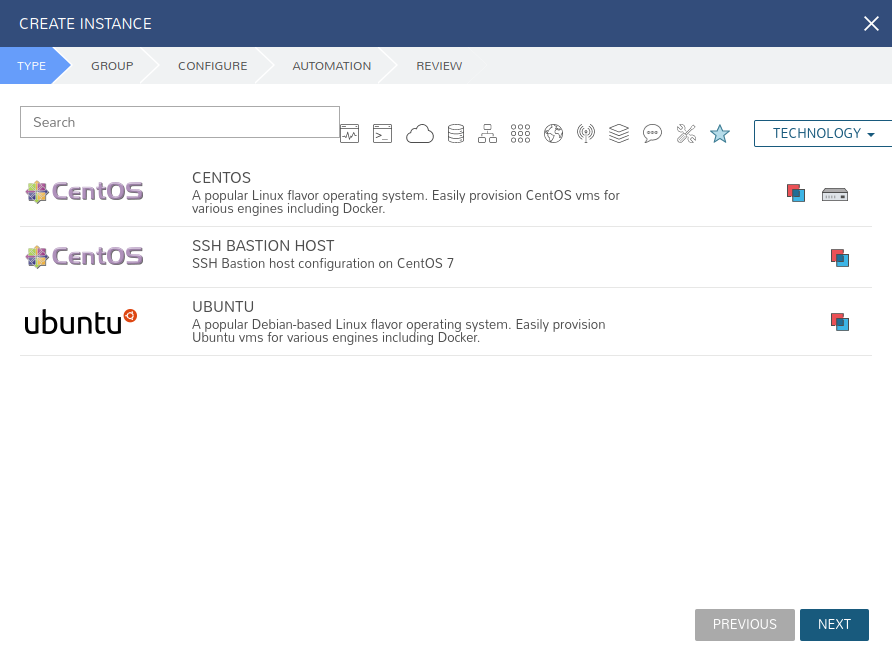
After pressing the button, a form with creating a new instance will appear.
In the "TYPE" tab you can choose the image with which the instance will be created. We recommend that you use Ubuntu or CentOS images
Currently, available Ubuntu versions:
- 20.04
- 18.04
- 16.04
- 14.04
Currently, available CentOS versions:
- 8 - Stream
- 7.5
- 7.3
After selecting the image, press the "NEXT" button.
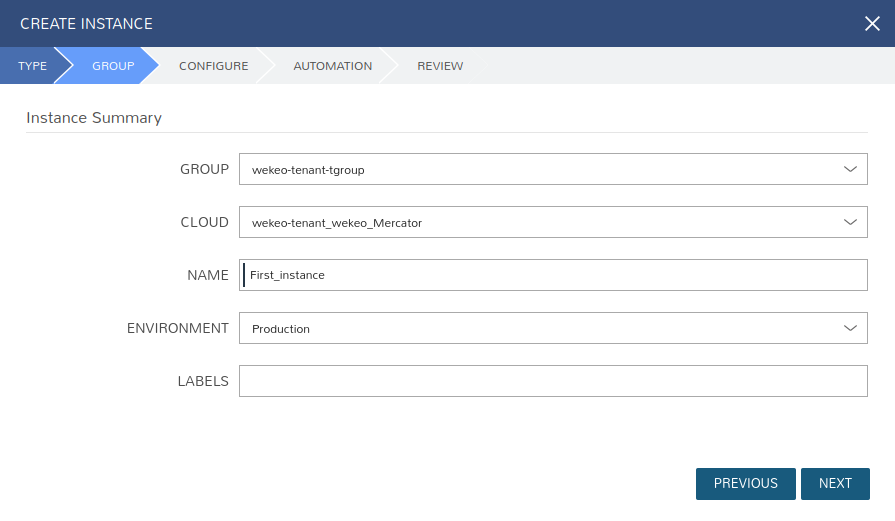
In the "GROUP" tab you can specify on which cloud you want to create a new instance, its name and assign a tag.
- GROUP - group is an aggregate for clouds, by default each tenant has one group,
- CLOUD - cloud on which you want to create a new instance. The following clouds are available at WEkEO:
- Mercator
- EUMETSAT
- ECMWF
all three clouds are transparent,
- NAME - name of the new instance, must be unique,
- ENVIRONMENT - tag is only used to sort instances depending on the environment it is running on; it is not necessary. Available tags:
- Dev
- Test
- Staging
- Production
In the "CONFIGURE" tab you can specify the detailed configuration of the instance.
- VERSION - version of the operating system with which the new instance will be created,
- PLAN - plan with which the new instance will be created. The plans consist of cores, RAM and storage.
- VOLUMES - we recommend to change from "Volume" option to "Local" in this field. You can add additional volumes by pressing the "+" button next to the "Volume" field. In the instance reconfiguration form, when changing the size of the instance, you must remember that by selecting the Volume option, the storage size of the volume will not change. If you select Local, the Storage size will increase according to the selected plan,
- NETWORKS - the instance will be created correctly if the <tenant_name>_local network is selected. The "external" network is available in this field, but this network is responsible for the pool of the public addresses, and an attempt to create an instance under this network will fail. The "StorageNFS" network is needed when you want to create File Share, but also an instance cannot be created only under this network. Can be attached with the <tenant_name>_local network. Note that the network "<tenant_name>_local" must be selected first, as the interface of the first network will be automatically configured.
- AVAILABILITY ZONE - select the "nova" option,
- SECURITY GROUP - by default, two security groups are available for each tenant:
- default - we recommend to create each instance with the "default" security group, because the instances that will be in this group will have internal communication,
- <tenant_name>_security_group - security group, which by default has rules on SSH and ICMP. If you want to get access via SSH immediately after creating an instance, you can choose this SG,
- FLOATING IP - if you choose the "external" option in this field, public address will be attached to your instance. Remember that the instance creation form is the only place where you can attach a public address to an instance.

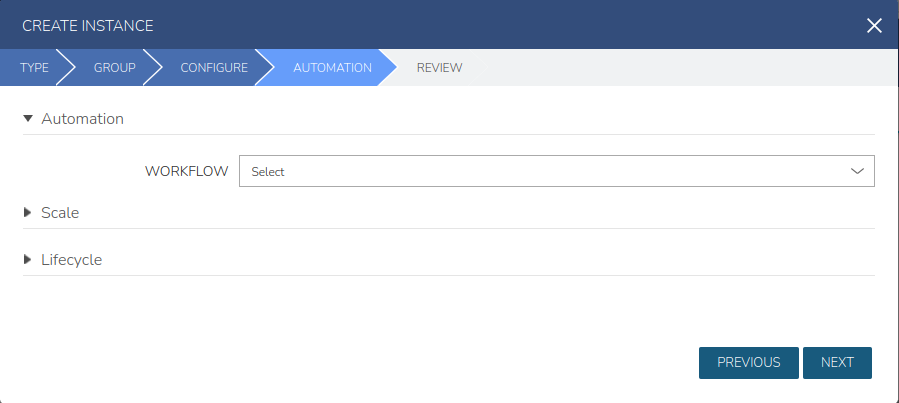
In the "AUTOMATION" tab you can set automation, for example, automation of backups, due to the fact that it can also be set outside the instance creation form, we recommend skipping this step by pressing the "NEXT" button.
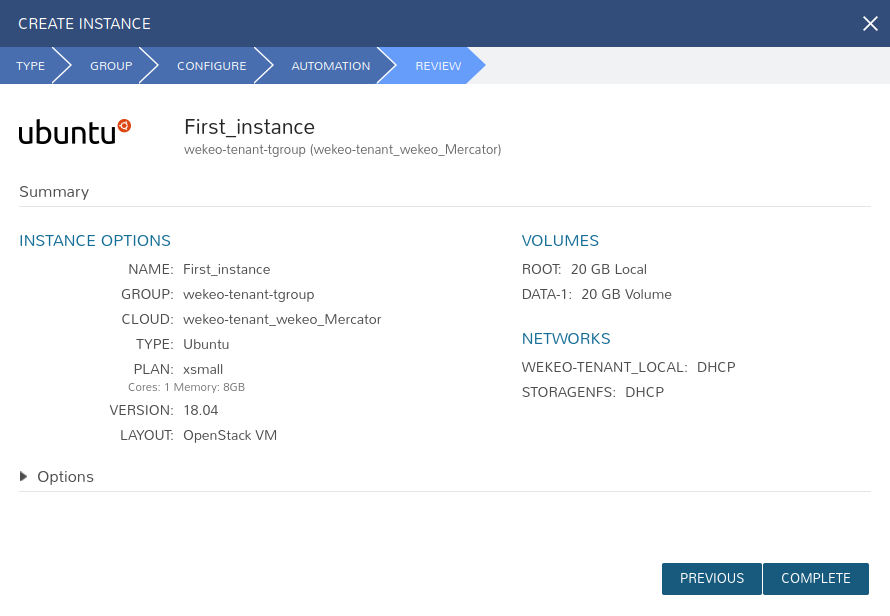
In the "REVIEW" tab you can view a summary of the instance that will be created. If you would like to change something, you can return to the tab you are interested in by pressing the "PREVIOUS" button or by pressing on a specific tab from the top menu. If you want to finish the form, press the "COMPLETE" button.
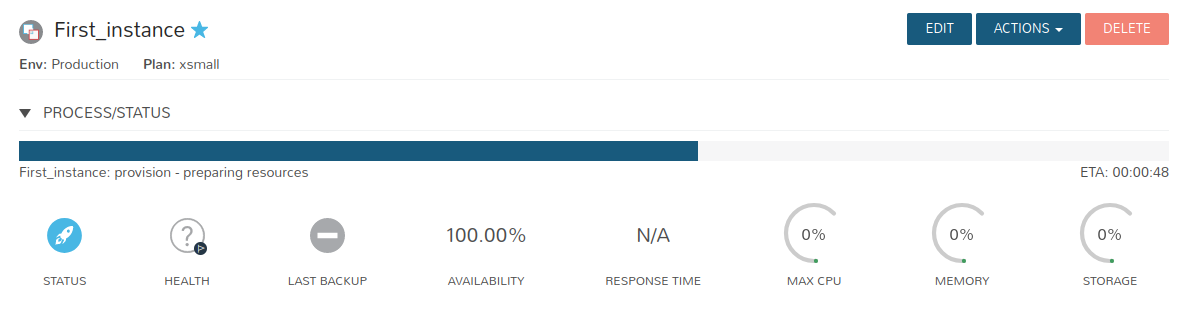
After completing the form, the instance will go into Provisioning state. Provisioning of the instance with a new image may take a little longer than next ones using the same image.
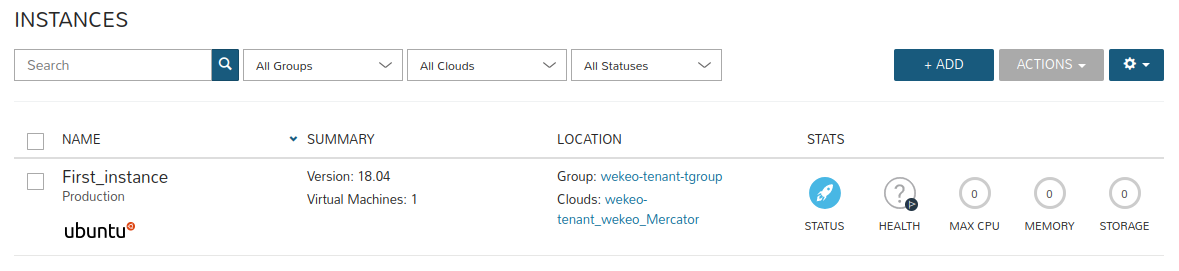
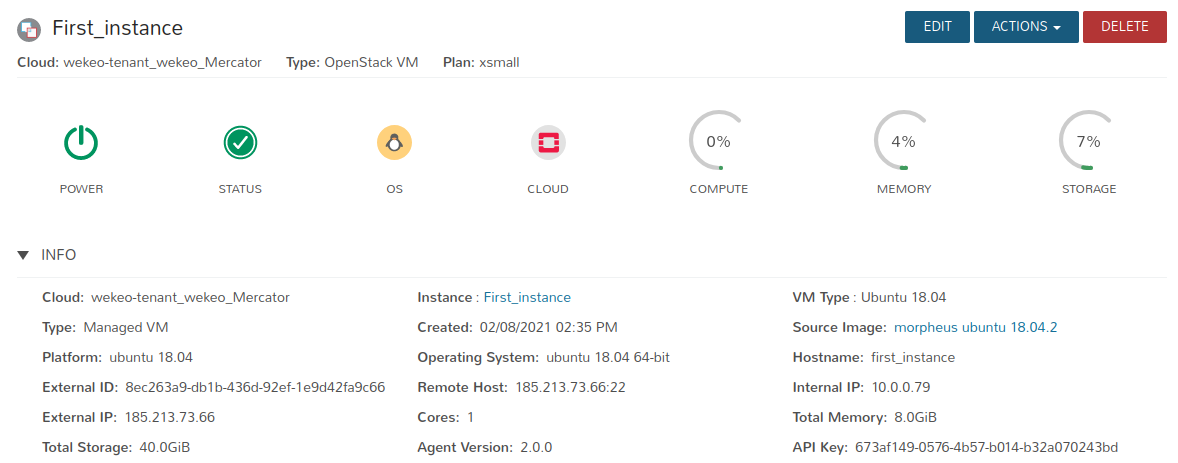
By pressing on the instance, you can go to details about it. In the information about the instance, you can find the approximate time with which the instance will be fully created.
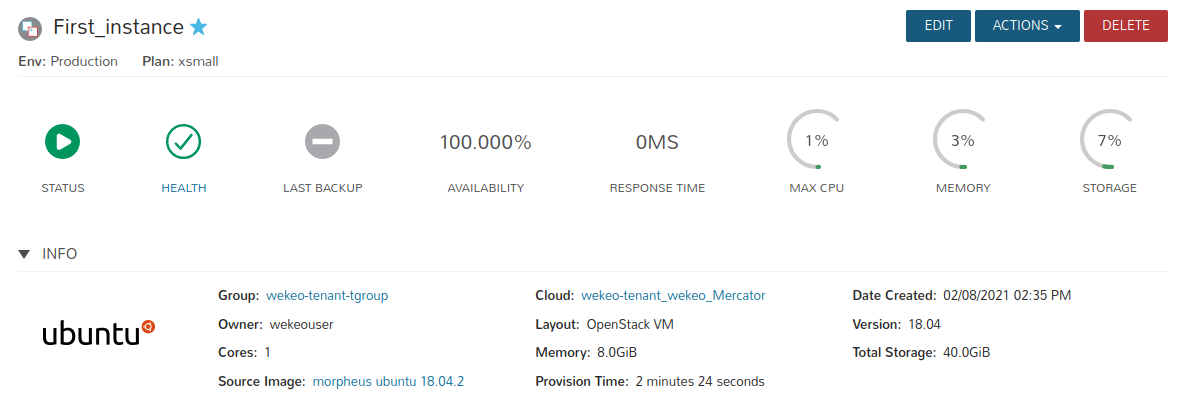
After successful creation, the instance will go into the Running state.
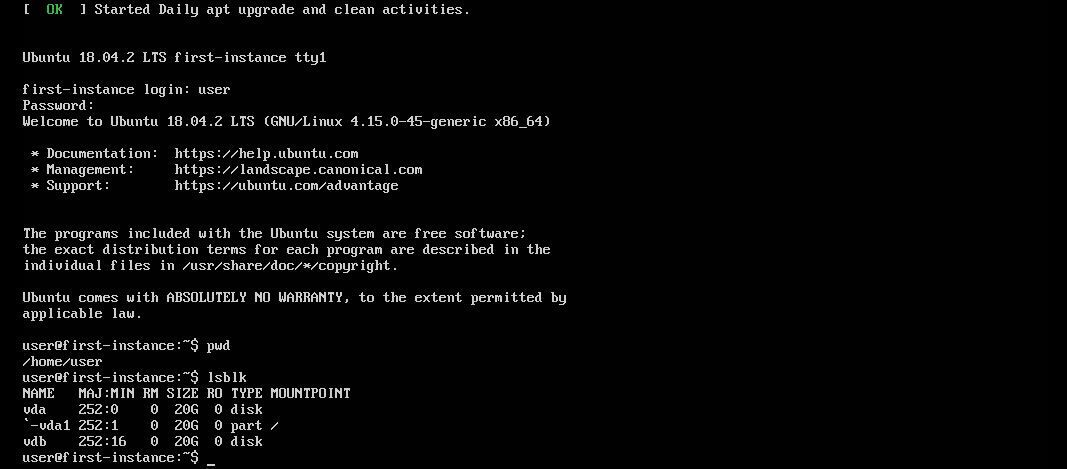
Instance access can be obtained both through the console in the Morpheus panel and via SSH if the instance has the appropriate security group attached and has a public address. You can go to the console from the Morpheus panel by clicking on the "Console" tab at the bottom section of the information about the instance.
The instance that has just been created leaves visible processes in the console that took place during the instance creation.
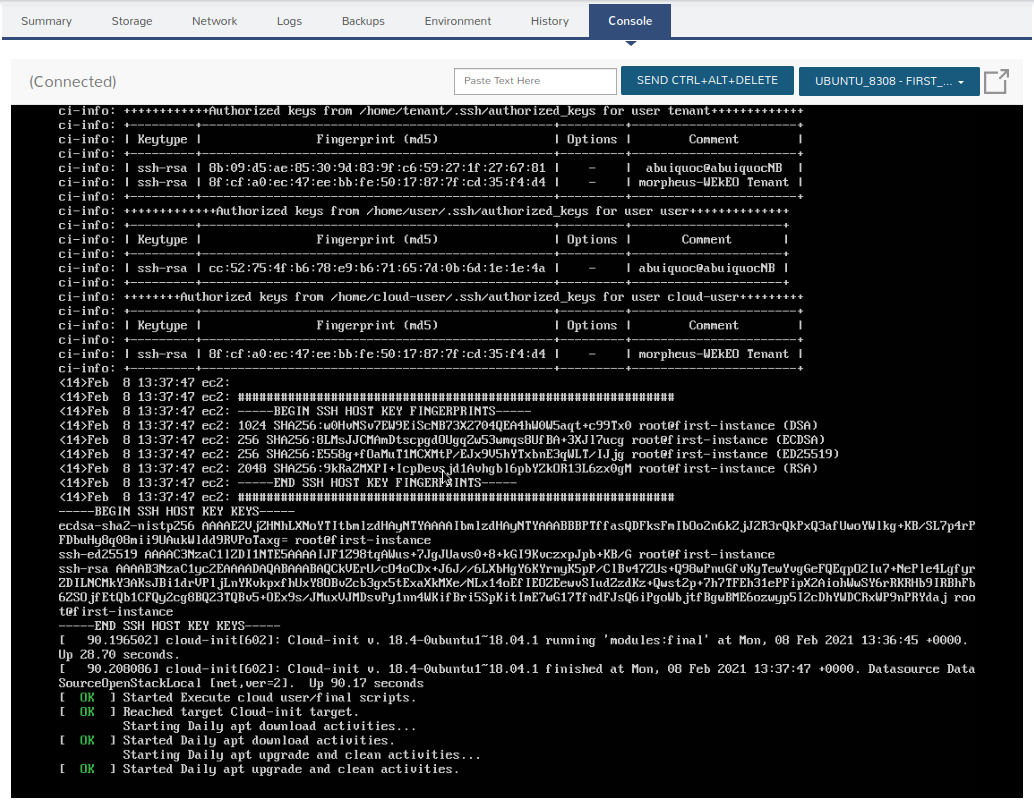
If the instance is in the Running state, all you have to do is press ENTER in the console and a login prompt will appear. After entering the login and password that you have previously configured, you will be logged in to the instance.
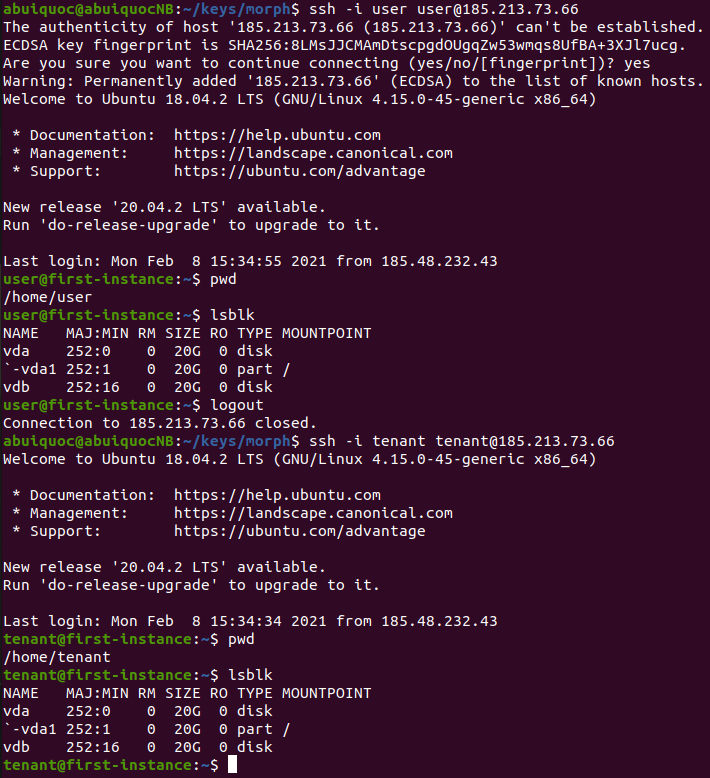
If the instance has a public address (floating IP) attached and has a security group that allows you to connect via SSH, you can access instance from any terminal using the following command:
ssh <user>@<floating_ip>Or with SSH key:
ssh -i <private_key> <user>@<floating_ip>You can check the public address which has been assigned to the instance in the VMS section in the "Location" column.

By pressing on the name of an instance in the VMS section, you will be redirected to detailed information about a given instance. The public address will also be visible next to Remote Host.
Below you can see the successful access to the instance via SSH by both users - "user" and "tenant" (global user).