Extending a volume
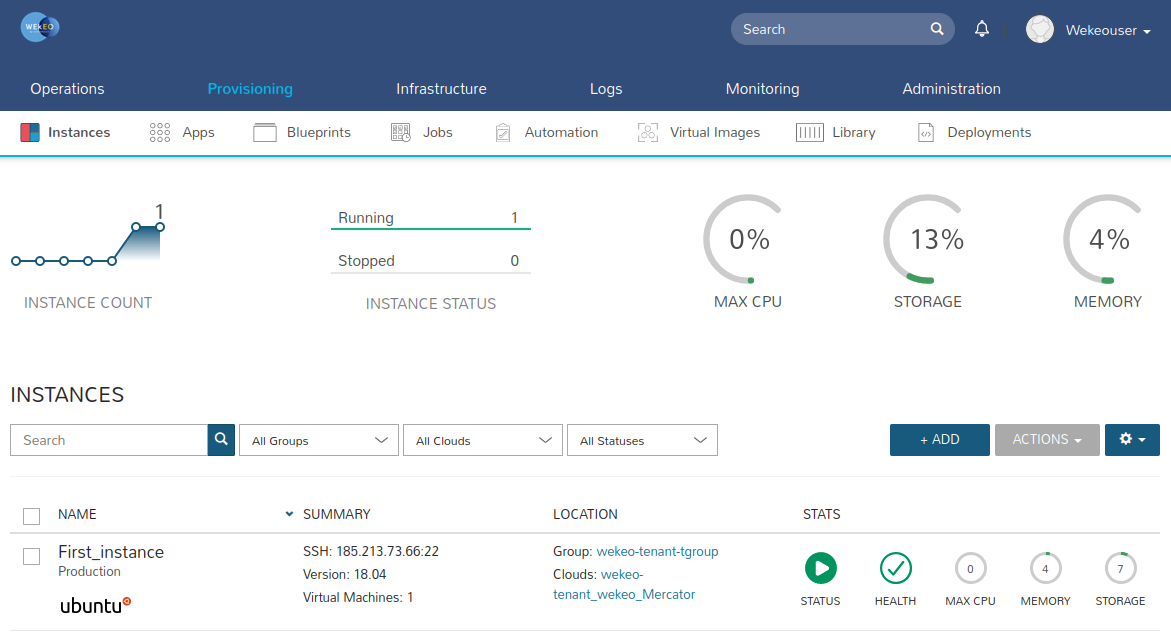
If you want to change size of your volume, go to Provisioning → Instances and select the instance to which this volume is attached.
Then press on the Action drop-down menu in the upper right corner and select the Reconfigure option.
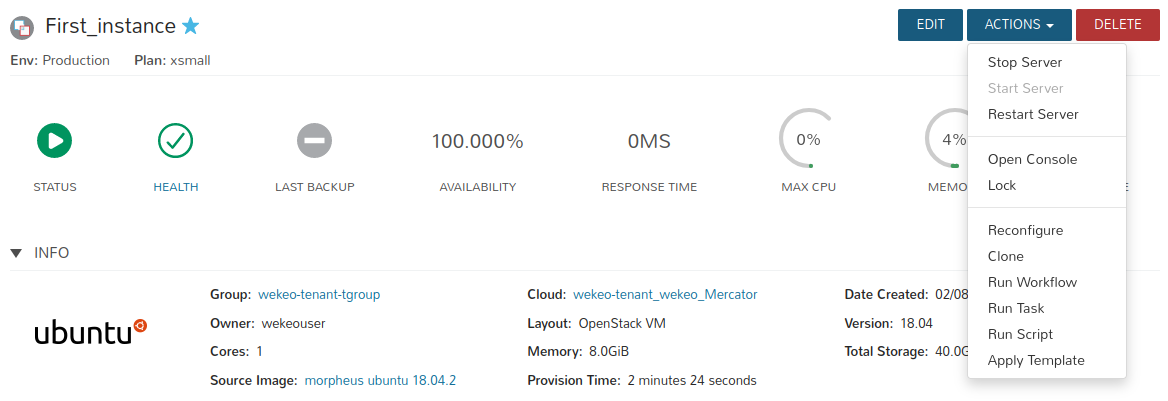
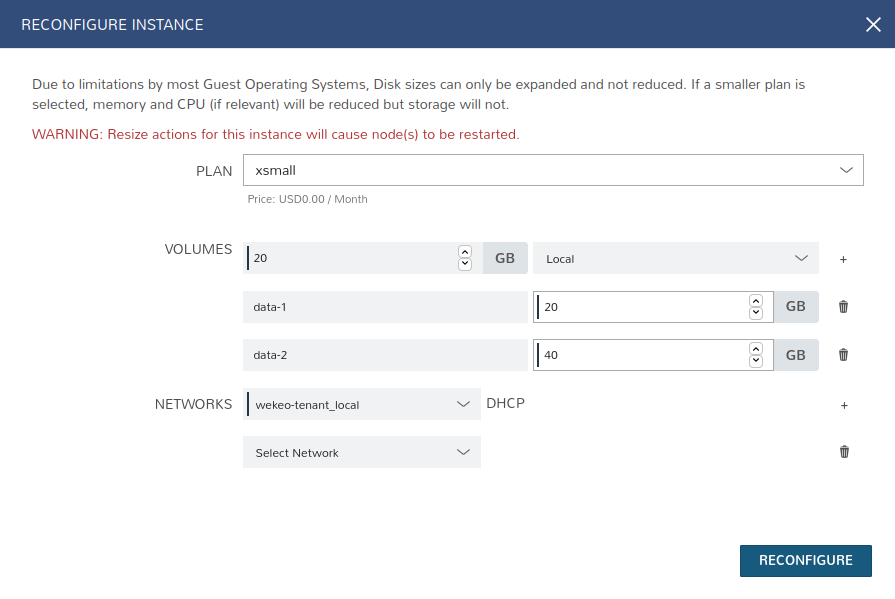
When the "Reconfigure Instance" window appears, currently attached volumes will be displayed.
WARNING: Disk sizes can only be expanded and not reduced. Resize actions for this instance will cause node(s) to be restarted.
You can change size of the volume by increasing the value of gigabytes in the right field (e.g. data-2 from 20 GB to 40 GB).
Click the "Reconfigure" button if you want to finish the reconfiguration process and extend attached wolume.
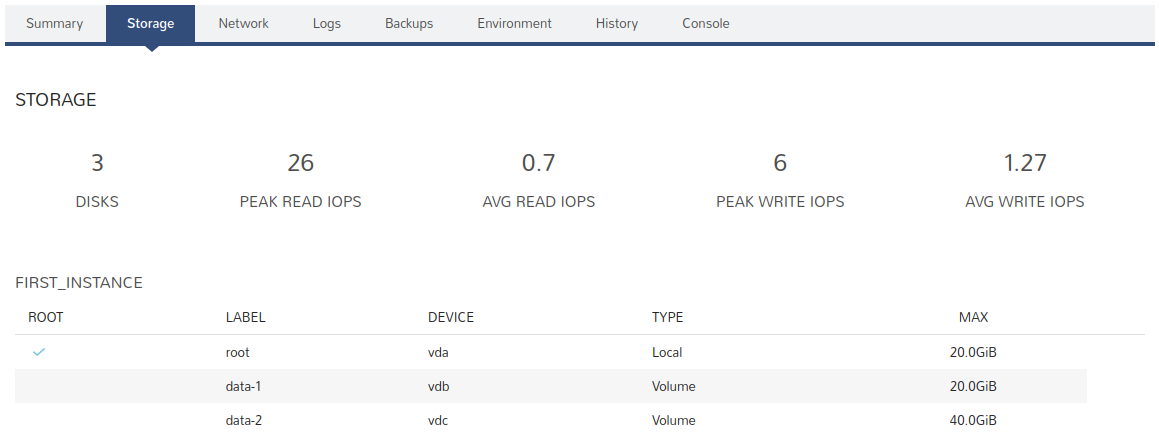
You can check the current attached volumes with their size in the “Storage” tab at the bottom section of the information about the instance.
The last step in the process is to extend the file system on volume
First connect to the instance via SSH.
ssh -i <private_key> <user>@<floating_ip>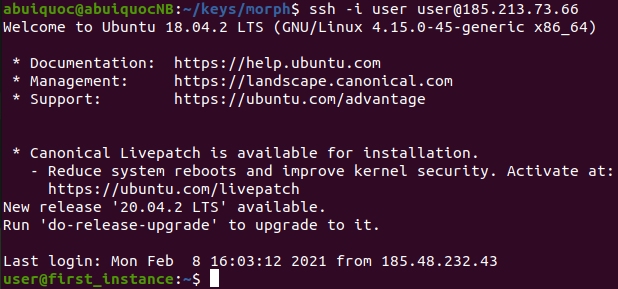
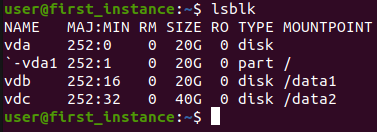
The "lsblk" command will show from the instance level whether the volume has been corectly extended. The size of the data-2 volume (vdc) has been increased from 20 to 40 GB.
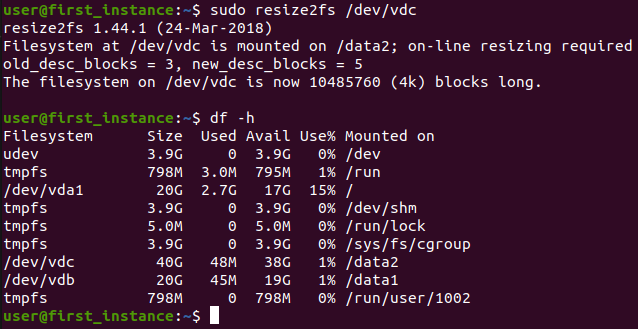
However, when executing the command "df -h" you will see that the volume "/dev/vdc" is still 20 GB in size.
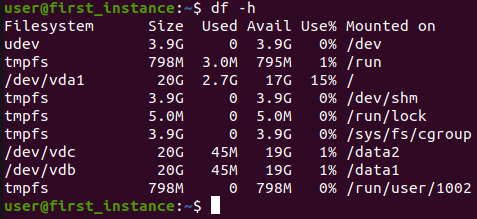
To extend the file system on volume, use the “resize2fs” command.
sudo resize2fs /dev/<disk>Then execute "df -h" command to verify.