Creating a Kubernetes cluster
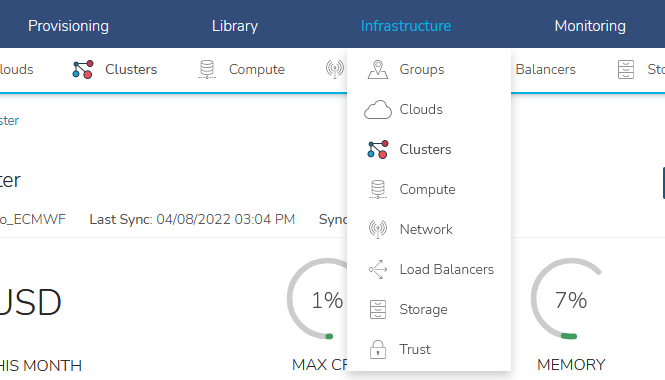
To create a Kubernetes cluster, go to Infrastructure → Clusters.
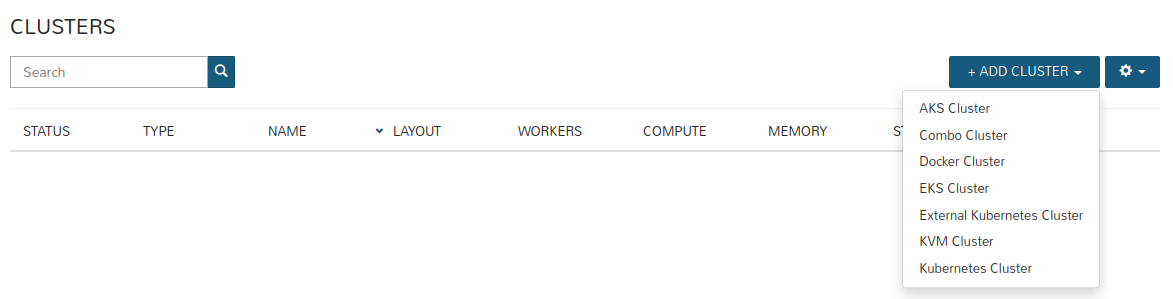
Then press the "+ ADD CLUSTER" button and select the"Kubernetes Cluster" option.
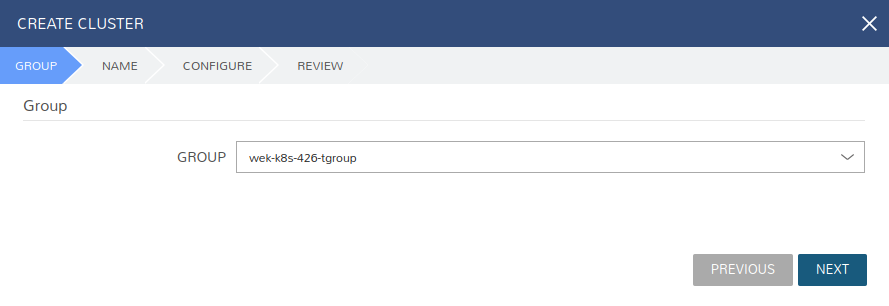
After selecting this option, a window with the creation of a new Kubernetes cluster will appear. In the "GROUP" tab choose your group. Each tenant has one group by default.
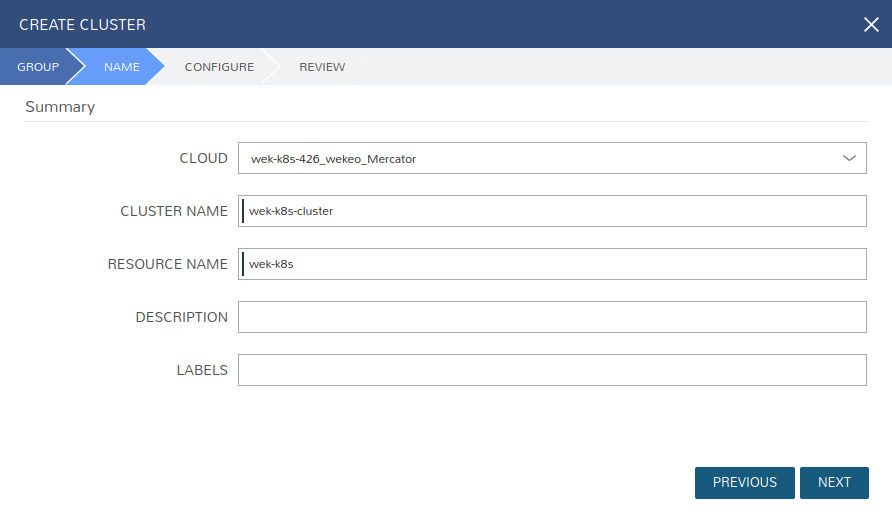
In the "NAME" tab, complete the following fields:
- CLOUD - select the cloud you want to create cluster on,
- CLUSTER NAME - name of the new cluster,
- RESOURCES NAME - the name with which the cluster resources will begin. Taking the example from the photo below, “RESOURCES NAME” has the name "wek-k8s" entered. So all resources will start with this name, e.g. wek-k8s-master or wek-k8s-worker-2.
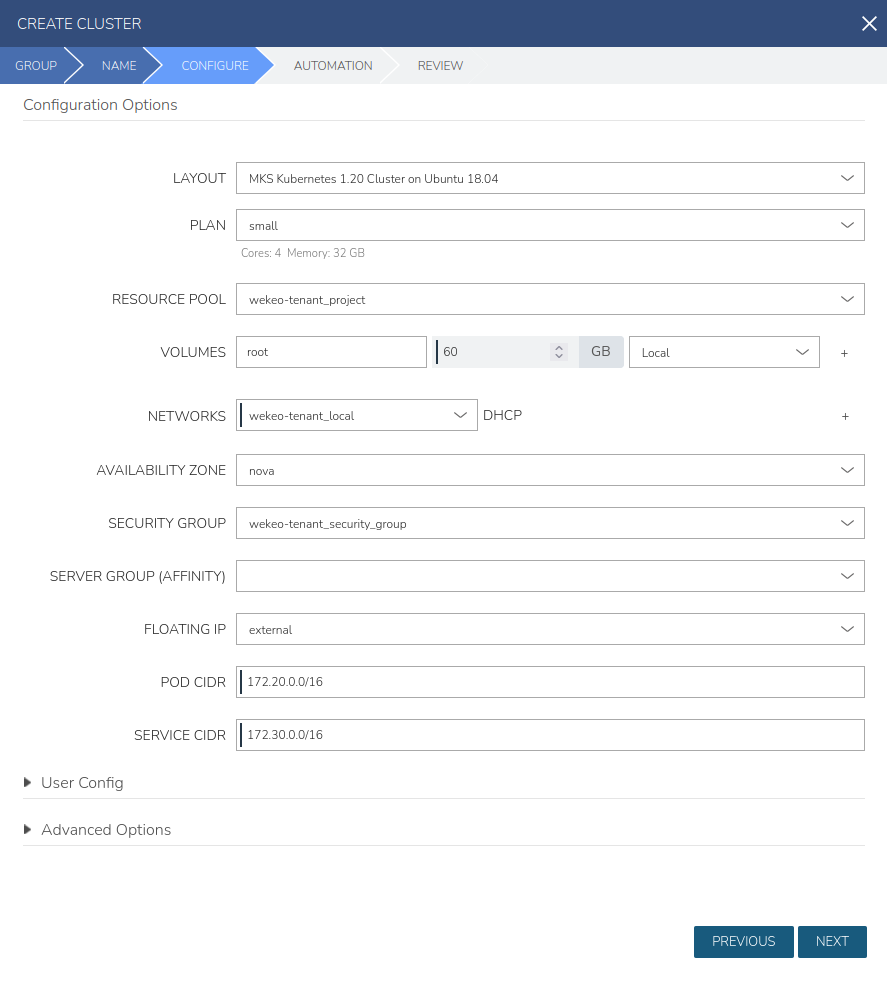
In the "CONFIGURE" tab, you can enter the cluster configuration. Complete the following fields:
- LAYOUT - You can choose whether you want to create a cluster with HA or not. A cluster with HA assumes the creation of 3 masters, without HA only one. At the moment, the cluster can be created with Ubuntu 18.04,
- PLAN - plan with which the master instances will be created. The plan "xsmall" is not listed due to the fact that instances in the cluster must have min. 2 cores.
- RESOURCE POOL - select resource pool of your project
- VOLUME - The size of the master instances adapts to the selected plan. We recommend changing the option from "Volume" to "Local",
- NETWORK - select the network under which the cluster will be created, each tenant has its own network,
- AVAILABILITY ZONE - select the "nova" option,
- SECURITY GROUP - security group that will be attached to each instance in the cluster. In the example below, a group that opens all ports has been selected, but you can create your own group before creating the cluster. However, remember that the lack of some open ports may result in the cluster or some of its features being unavailable. As part of the tests, we suggest opening all ports "1-65535" and then limiting it according to the given needs.
- FLOATING IP - select the "external" option. If this option is not selected, the cluster will not be reachable.
After entering the configuration, press the "NEXT" button.
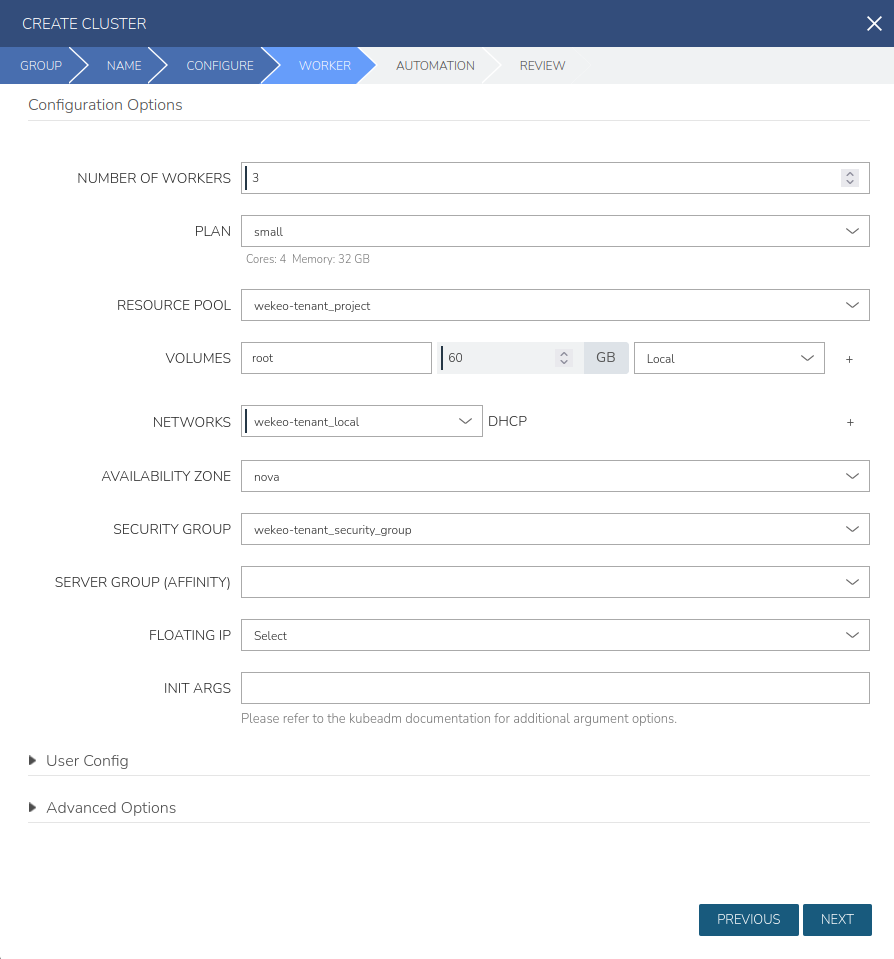
In the WORKER section you can specify:
- Number of Worker Nodes
- Plan (or Flavor) for Worker Nodes
- Resource Pool of your project
- Volumes that'll be attached to nodes
- Network
- Security Group
- Floating IP - create worker nodes with Floating IP associated. We're not recommending creating worker nodes with Floating IP for security reasons. It's much safer to leave this option unselected.
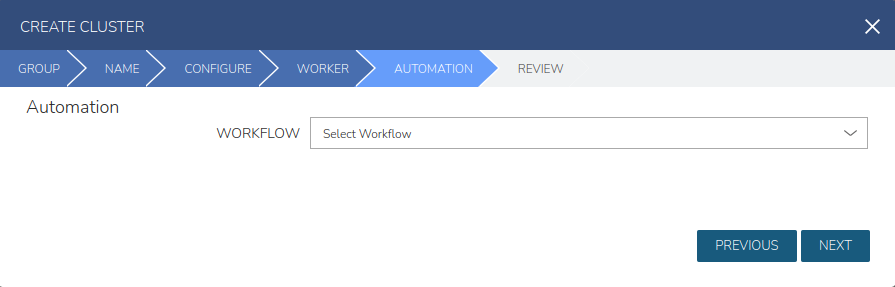
At the next Page you can select Workflow to automate cluster.
After entering the configuration, the cluster creation summary in the "REVIEW" tab will be displayed. If everything is correct, press the "COMPLETE" button.
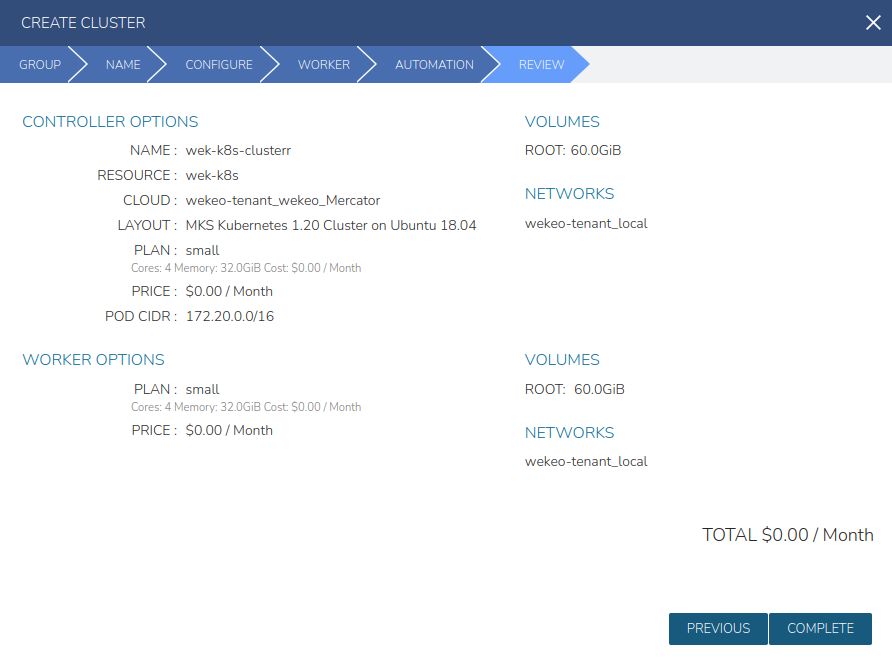
The cluster will start to form. Master instances will be created first.

Clicking on the name of the cluster will go to the details about it. After creating and configuring the master instances, the worker instances will be created.

The larger the cluster was selected at the configuration stage, the longer the entire cluster will be created. After some time the cluster status should turn green (ok) which means that the cluster is ready. Select a cluster by clicking on its name.

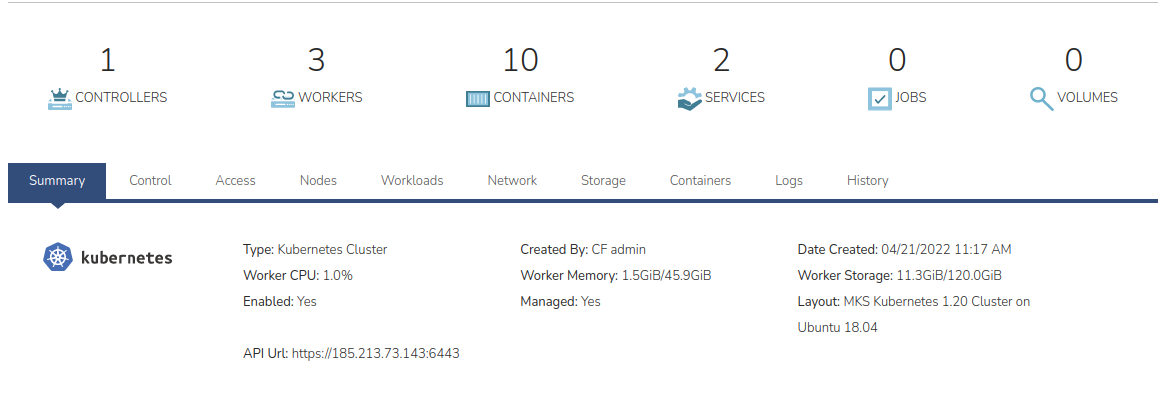
In the bottom menu, in the "Summary" tab, there will be a summary of the entire cluster.
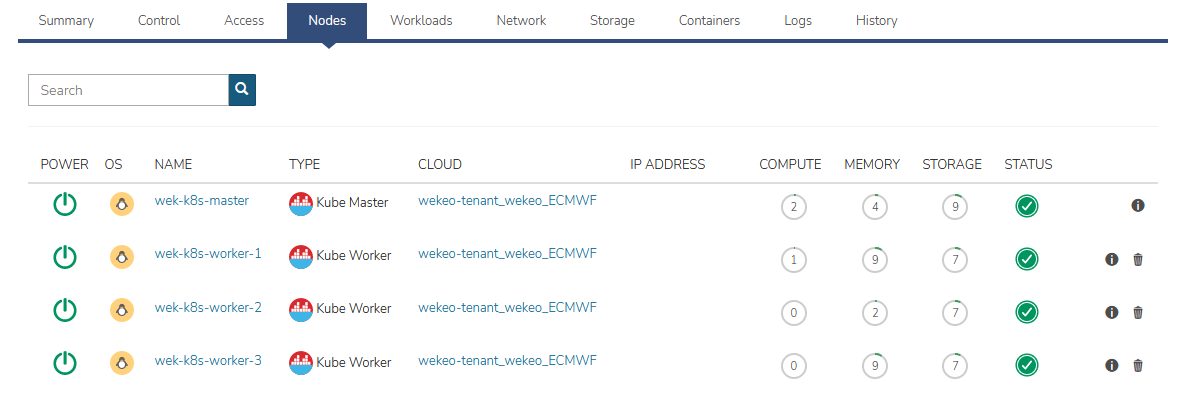
In the Nodes tab you can view the masters and workers instances with their public addresses.
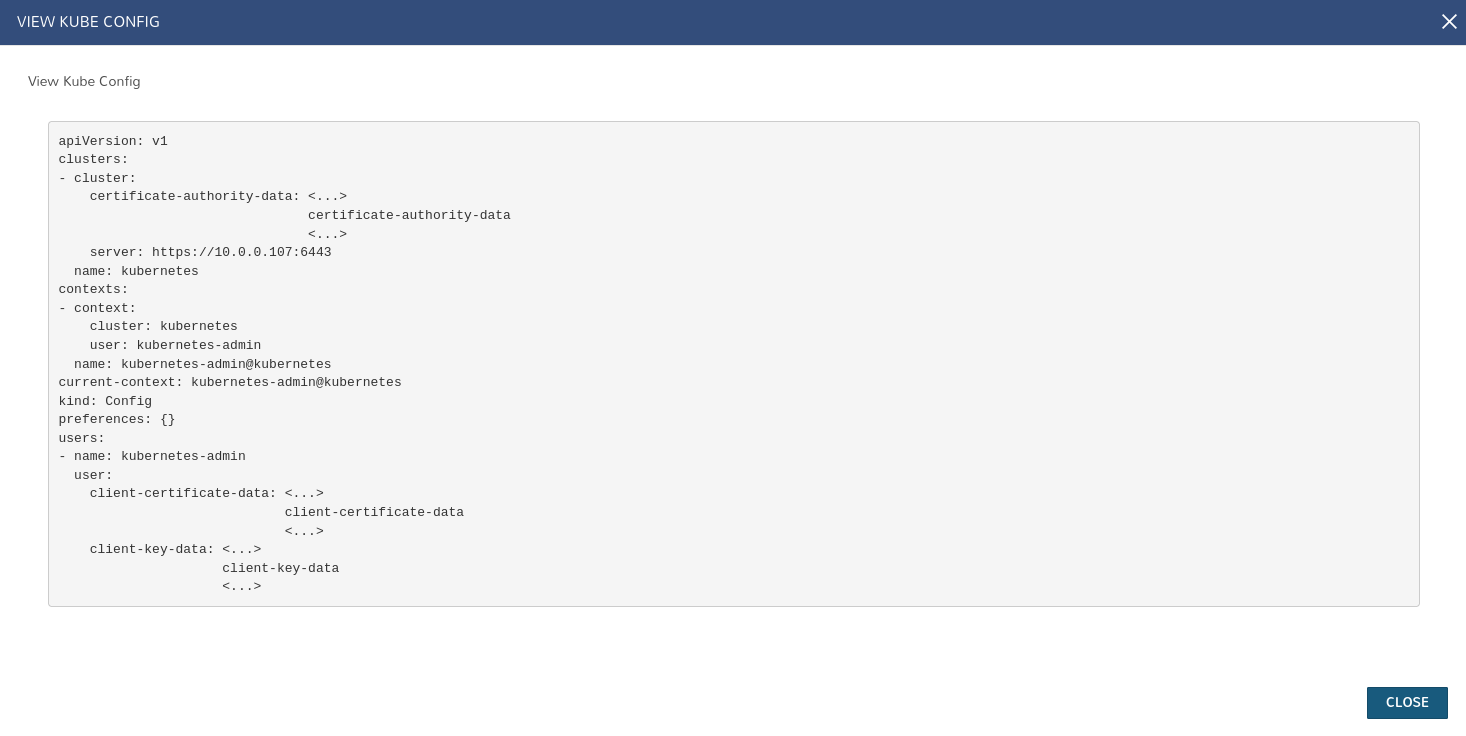
In order to gain control over the cluster, first copy "Kube Config". To do this, press the "ACTIONS" button and select "View Kube Config".

Copy all the contents of config.
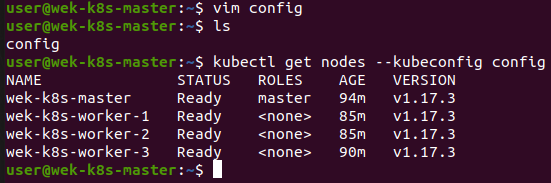
Then access the instance that has the Kubernetes command-line tool "kubectl". Master instances have such a tool built-in.

Copy the cluster configurations into this file. You will probably need to get rid of the tabs in the configuration that Morpheus's creating. Then run the "kubectl get nodes" command with the "--kubeconfig" parameter pointing to the "config" file. You should get information about the cluster resources.
You can run this command without selecting the configuration file, but to do this go to the ".kube" folder. Create the "config" file again and paste the cluster configurations into it. Then go back to the previous directory and delete the "config" file you created at the beginning. Run the "kubectl get nodes" command again. Note that you did not have to specify a configuration file parameter.
