Automation
- 1. Tasks
- Adding Tasks
- Editing Tasks
- Deleting Tasks
- One-time task execution
- Task execution result
- 2. Workflows
- Add Workflow
- Edit Workflow
- Delete Workflow
- Workflow execution when creating an instance
- One-time workflow execution
- Workflow execution result
- 3. Power Scheduling
- Create Power Schedules
- Add Power Schedule to Instance
- 4. Execute Scheduling
- Create Execution Schedules
- 5. Jobs
- Adding Jobs
1. Tasks
Tasks are primarily created for use in Workflows, but a single Task can also be executed on an existing instance. There are many Task Types available, including scripts added directly, scripts and templates from the Library section, recipes, playbooks, salt states, puppet agent installs, and http calls.
Adding Tasks
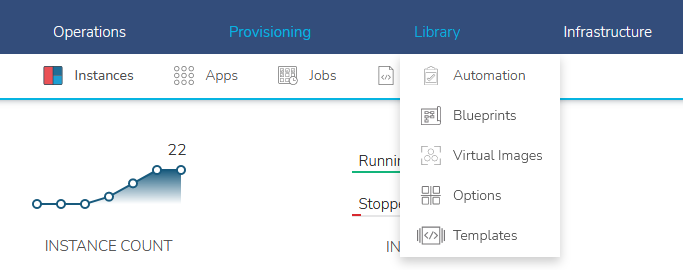
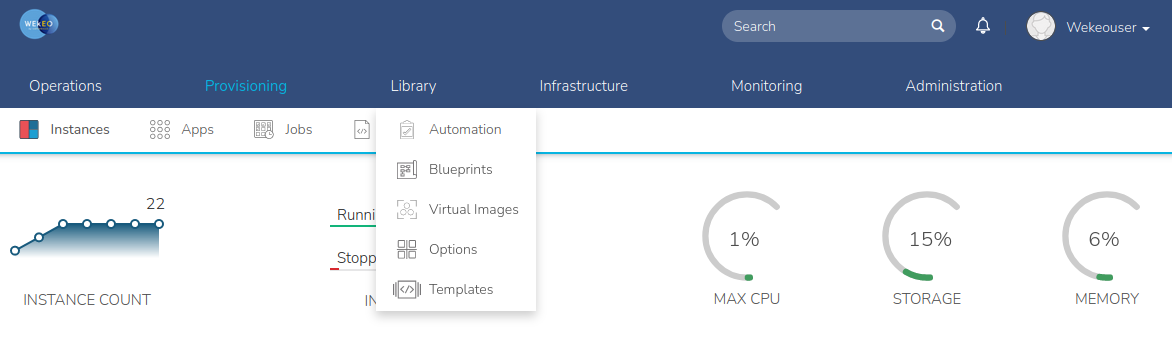
Select the Library link in the navigation bar.
- Select Automation from the sub-navigation menu.
- Make sure you are in the Tasks tab and click the + ADD button.

- From the New Task Wizard input a name for the task.
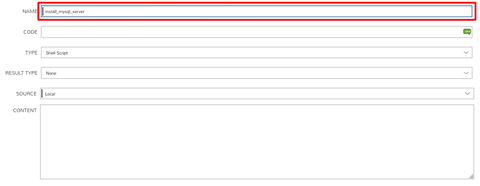
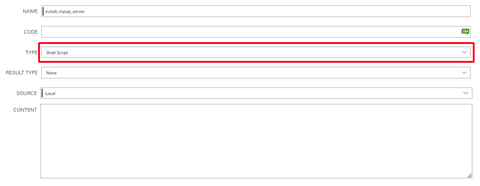
- Select the type of task from the type dropdown.
- Input the appropriate details dependent on the task type you selected from the dropdown and click SAVE CHANGES.
If you want to run a script that is on an instance form the Morpheus panel, then you MUST provide the full paths to the files/directories in both the script on the instance and in the Morpheus Script that runs the script.
For example:
If the user script assumes saving a file, it must provide the full path where this file is to be saved. For example, if the script contains the command:
touch test.txt
A script executed from the Morpheus level will fail. The user must specify the full path in the script on the instance:
touch /home/user/test/test.txt
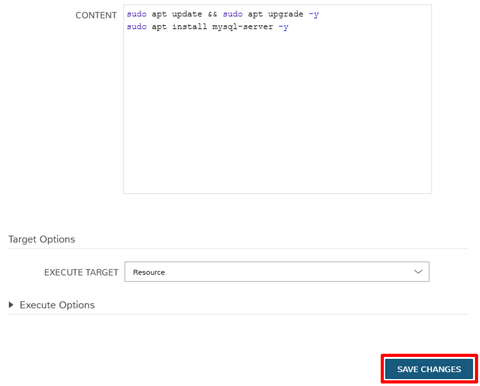
We recommend adding sudo apt update && sudo apt upgrade line at the beginning of the script. We also recommend adding -y option to confirm the command. Otherwise, the command will not be executed because the task will wait for user response.
Editing Tasks
Select the Provisioning link in the navigation bar.
Select Automation from the sub-navigation menu.
- Click the Edit icon on the row of the task you wish to edit.

Modify information as needed.
- Click the Save Changes button to save.
Deleting Tasks
Select the Provisioning link in the navigation bar.
Select Automation from the sub-navigation menu.
- Click the Delete icon on the row of the task you wish to delete.

One-time task execution
Navigate to Provisioning → Instances
Select an Instance
- Select ACTIONS → RUN TASK

- Choose a task you want to run.
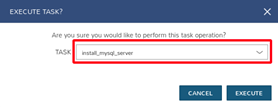
- Click EXECUTE
Task execution result
Navigate to Provisioning → Instances
Select an Instance
- Select History tab in the bottom table

2. Workflows
Add Workflow
Select the Provisioning link in the navigation bar.
Select Automation from the sub-navigation menu.
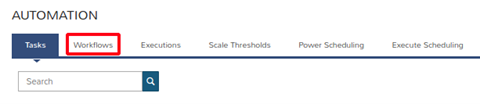
- Click the Workflows tab to show the Workflows tab panel.
- Click the + ADD button and select one of the options.

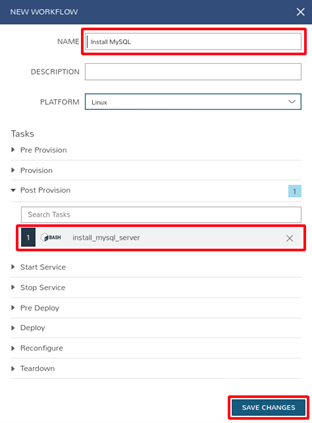
From the New Workflow Wizard input a name for the workflow.
Optionally input a description.
Expand the execution phases to add tasks to, and type the name of a created task and click the task when it appears to add.
If multiple tasks are added to the same execution phase, their execution order can be changed by selecting the grip icon and dragging the task to the desired execution order.
For multi-tenant environments, select Public or Private visibility for the Workflow.
- Click the SAVE CHANGES button to save.
Edit Workflow
Select the Provisioning link in the navigation bar.
Select Automation from the sub-navigation menu.
Click the Workflows tab to show the workflows tab panel.
- Click the Edit icon on the row of the workflow you wish to edit.

Modify information as needed.
- Click the Save Changes button to save.
Delete Workflow
Select the Provisioning link in the navigation bar.
Select Automation from the sub-navigation menu.
Click the Workflows tab to show the workflows tab panel.
- Click the Delete icon on the row of the workflow you wish to delete.

Workflow execution when creating an instance
When creating an instance, in the Automation tab, expand the Automation section.
- In the WORKFLOW dropdown, select a workflow.

- Continue creating the instance.
If you want to check workflow execution result:
Navigate to Provisioning → Instances
Select the instance you have created
- Select History tab in the bottom table

One-time workflow execution
Navigate to Provisioning → Instances
Select an Instance
- Select ACTIONS → RUN WORKFLOW
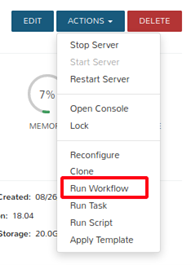
- Choose a workflow you want to run.

- Click EXECUTE
Workflow execution result
Navigate to Provisioning → Instances
Select an Instance
- Select History tab in the bottom table

3. Power Scheduling
Set weekly schedules for shutdown and startup times for Instances and VM’s. Apply Power Schedules to Instances pre- or post-provisioning.
Create Power Schedules
- Navigate to Library → Automation → Power Scheduling
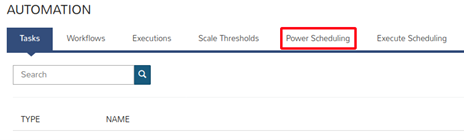
- Select +ADD

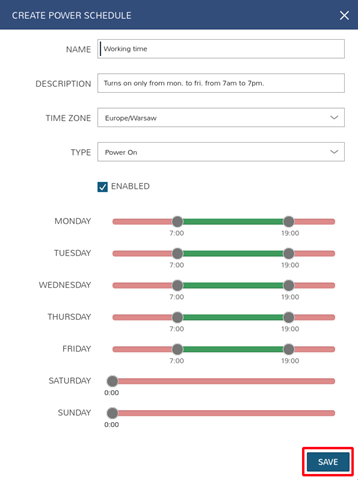
- Configure the following options:
NAME - Name of the Power Schedule
DESCRIPTION - Description for the Power Schedule
TIME ZONE - Time Zone the Power Schedule times correlate to.
TYPE
Power On - Power Up and then Down at scheduled times
Power Off - Power Down then Up at scheduled times
Enabled - Check for Power Schedule to be Active. Uncheck to disable Power Schedule.
DAYS - Slide the start and end time controls for each day to configure each days Schedule. Green sections indicate Power on, red sections indicate Power Off. Time indicated applies to selected Time Zone.
Add Power Schedule to Instance
Navigate to Provisioning -> Instances.
Select an Instance
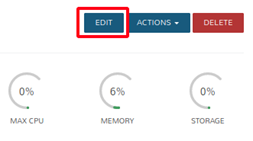
- Select EDIT
- In the POWER SCHEDULE dropdown, select a Power Schedule.
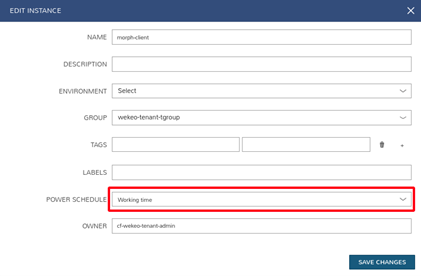
- Select SAVE CHANGES
Remember, create power schedules for Instance before or after deployment. Otherwise, the POWER SCHEDULE option will be invisible.
4. Execute Scheduling
Execute Scheduling creates time schedules for Jobs, including Task, Workflow and Backup Jobs.
Create Execution Schedules
Select the Provisioning link in the navigation bar.
Select Automation from the sub-navigation menu.
- Select the Execute Scheduling tab, then click + ADD button.

- Enter the NAME of the Execution Schedule and optionally the DESCRIPTION.
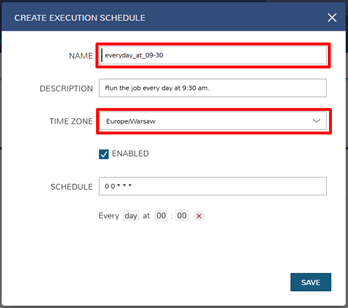
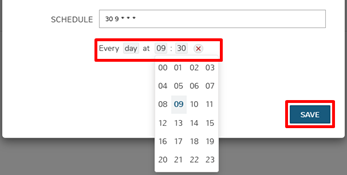
- Set the SCHEDULE according to your preferences and click SAVE.
5. Jobs
Jobs are for scheduled execution of Automation Tasks and Workflows. Jobs can be set to execute on a schedule, at one specific point in time, and/or execute manually (on-demand). Jobs are linked to existing Tasks or Workflows, and allow for custom configuration options. Jobs can be associated with Instances, Servers, or have no association, such as a job for an SSH task.
Adding Jobs
Select the Provisioning link in the navigation bar.
- Select Jobs from the sub-navigation menu.
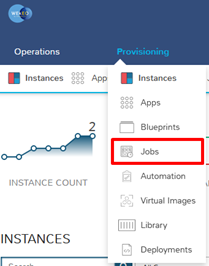
- Click the + ADD button.

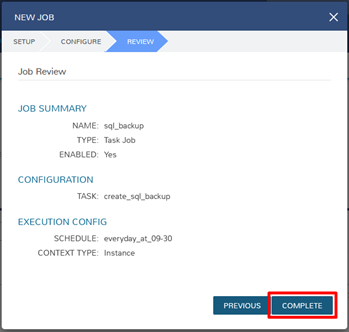
- Enter the NAME of the job and select JOB TYPE, then click NEXT.

- Select the TASK you execute in this job. Task must be created in the Automation → Tasks section.

- Select SCHEDULE to Manual or choose one of the schedulers. You can create your own in the Automation → Execute Scheduling section.
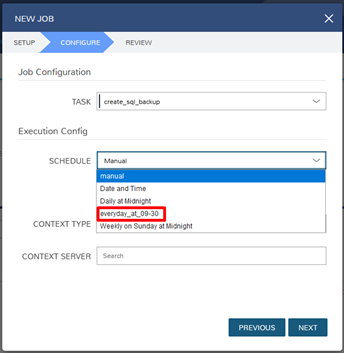
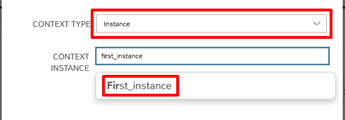
- Choose the CONTEXT TYPE and start typing the name of the CONTEXT SERVER/CONTEXT INSTANCE. Select the ones where you want to run the tasks.
- Click NEXT.

- In the REVIEW tab you can once again check all settings, then click COMPLETE to finish.